

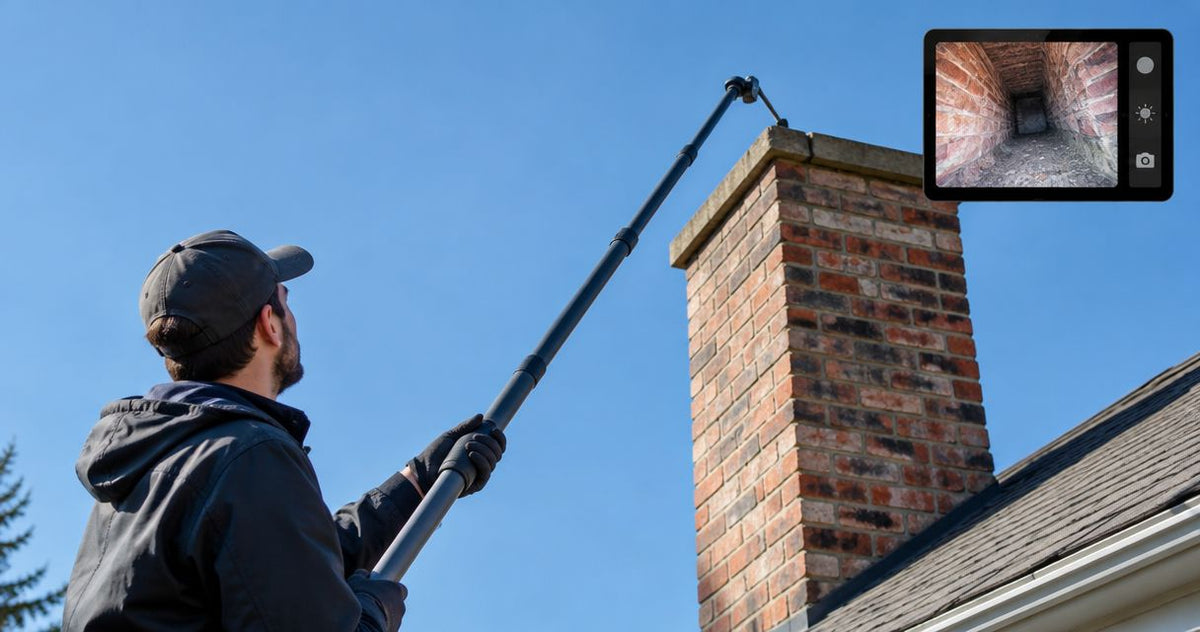
A chimney crown can look fine from the driveway and still hide a cracked cap, lifted flashing or mortar gone soft. Climbing a roof to find out costs time, adds fall risk and often sits on the wrong side of a client's insurance. A pole camera lets you raise the lens to the chimney top from the ground and record what is there.
The short answer: raise a pole camera along the chimney face, scan the cap, crown, flashing and masonry from the top down, and record every pass. The Dual View Pole Camera COBRA is built for this exterior job. It does not see inside the flue. Fiberscope.net sells and services the cameras discussed here.
- Raise a pole camera along the chimney face and scan the cap, crown, flashing and masonry from the top down.
- Check overhead line clearance first; OSHA 1910.333 sets 10 ft (3 m) for lines up to 50 kV.
- The COBRA pole camera has a rotating dual view and records to SD, so one pass covers two angles.
- A ground-level pole camera shows the exterior only; the flue interior needs a separate video scan.
How do you inspect a chimney from the ground with a pole camera?
You inspect a chimney from the ground by extending a pole camera up the chimney face, viewing the live feed on a monitor at your feet, and recording each pass over the cap, crown, flashing and masonry. Six steps cover it.
1. Check clearance before you raise anything
Look for service drops and overhead lines near the chimney before the pole leaves the ground. OSHA 1910.333 sets minimum approach distances, 10 ft (3 m) for lines up to 50 kV. Use a non-conductive pole and stay well outside that distance. If a line runs between you and the chimney, set the job up from another side or skip the pole.
2. Match the camera to the view you need
A chimney top needs a lens that looks sideways and down as well as forward. The COBRA rotates its view, so you can look across the crown and then down at the flashing without lowering the pole to re-aim. It records to SD, which gives you clip evidence for the report. For a deeper look at pole choices for roofs and attics, see the pole camera guide for roof and property inspectors.
3. Test at ground level
Power the camera, confirm the monitor shows a clean image and record a five-second test clip to the SD card. Play it back. A card that fails on the roofline wastes the whole setup.
4. Raise the pole from a stable stance
Stand on firm, level ground a few feet back from the wall, angled so you can see both the monitor and the chimney. Extend the pole one section at a time. Keep the base planted and your elbows close; a long extended pole moves a lot at the tip in wind, and a blurred clip tells you nothing.
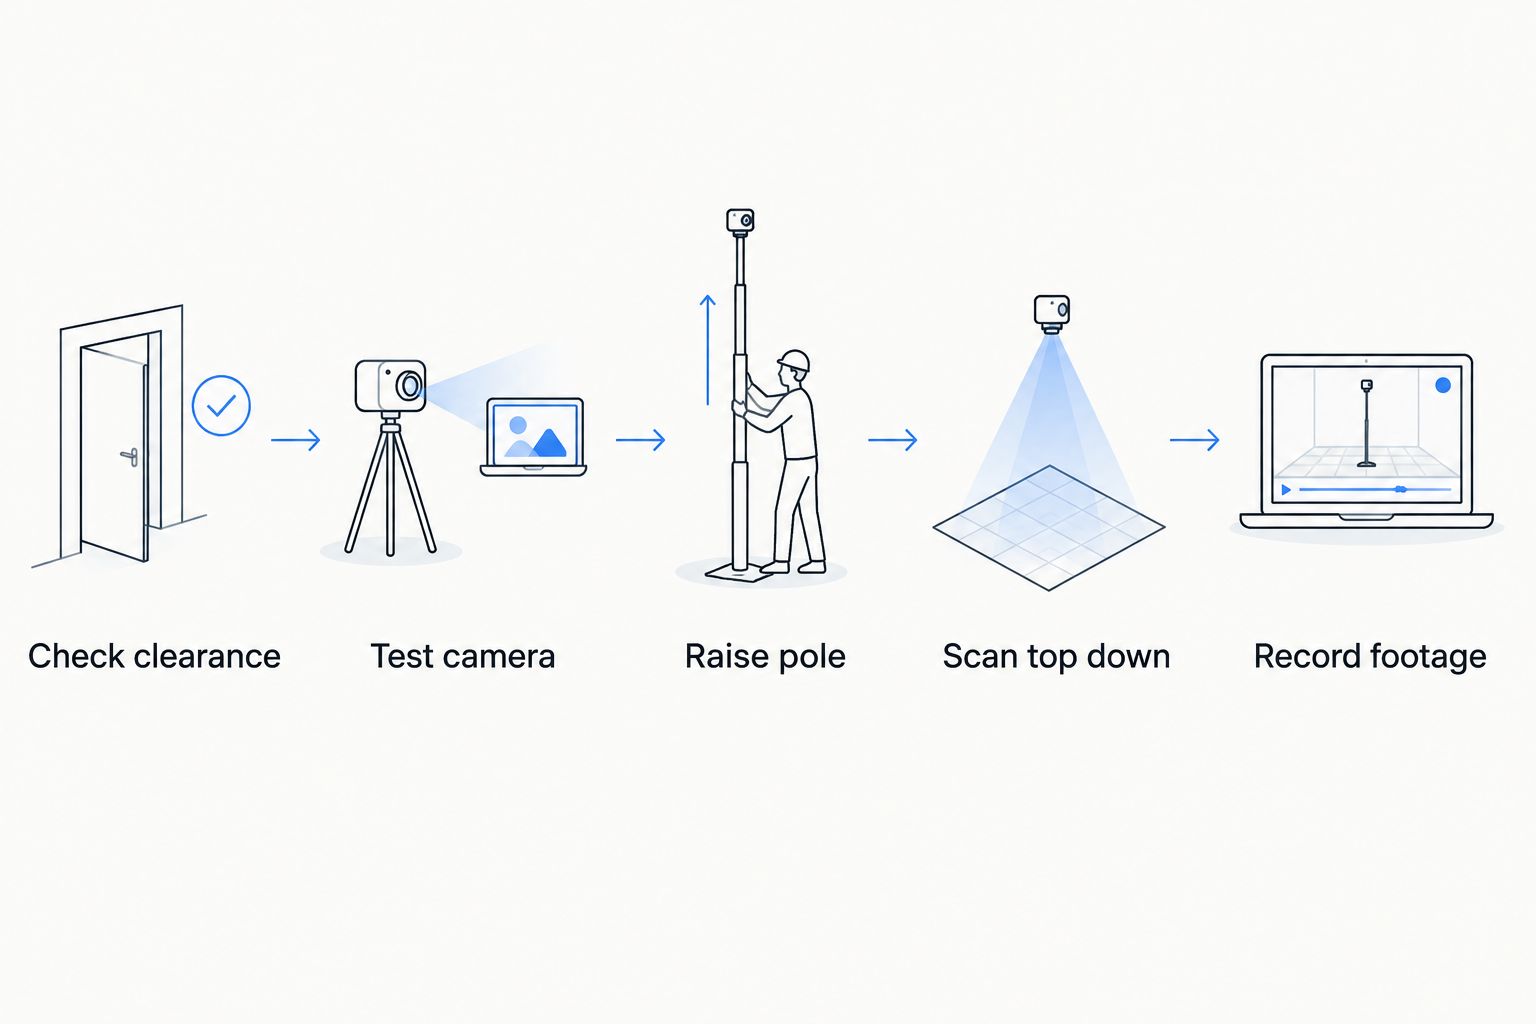
5. Scan from the top down
Start at the cap and work down so you do not miss the highest damage. Take one slow pass per face of the chimney, then a second pass with the view rotated. The table shows what each area tells you.
| Area | What to look for | View to use |
|---|---|---|
| Cap or spark arrestor | Rust-through, missing or loose cap, bent screen | Forward, then side |
| Crown | Cracks, crumbling, water pooling | Side view across the top |
| Flashing | Lifted edges, gaps at the roof joint, failed sealant | Downward |
| Masonry and mortar joints | Spalling brick, recessed or missing mortar | Forward along each face |
| Chimney lean | Visible tilt against the roofline | Wide pass from the ground |
Crown cracks and failed flashing are the usual causes of water entering the chimney. Photograph them before and after any repair.
6. Record and log findings
Save clips with the address and the face of the chimney in the file name. Pull a still of each defect for the written report. The pole inspection camera to property report workflow walks through turning footage into a client document.
What a ground-level pole camera can and cannot see
A pole camera shows the exterior of the chimney from the cap down to the roofline. It does not show the flue liner, creosote buildup or internal cracks. NFPA 211 defines inspection levels, and a Level 2 inspection includes a video scan of the flue interior. The Chimney Safety Institute of America publishes guidance on the same levels.
So a pole camera from the ground is a good exterior survey and a poor substitute for a flue scan. Say that in the report, and recommend a Level 2 inspection when the exterior shows damage, when the chimney serves a fireplace or stove, or when the property is changing hands.
The pole also stops where the pole stops. A tall chimney on a steep, multi-story roof may sit beyond what you can safely raise from the ground. In that case, a camera on a different platform or a roof visit is the honest answer.
Why chimney pole inspections vary job to job
- Chimney height and roof pitch. A taller chimney needs a longer pole and a steadier base.
- Wind. Gusts move the tip of an extended pole; wait for calm or shorten the pole.
- Sun angle. Backlit crowns wash out; work from the side where the sun is behind you.
- Overhead lines. They decide where you can stand and whether the job is possible at all.
- Surrounding trees and gutters. They block the pole path and the lens view.
- Screen glare. A monitor in direct sun is hard to read; shade it with your body or a hood.
What you'll also need
A pole camera is the main tool. Before you start, bring a non-conductive pole rated for the extension you plan to use, a spare SD card, and a way to shade the monitor. Fiberscope.net also carries the CYCLOPS HD pole camera if you prefer a monitor connected over WiFi. For budget planning, see how much a pole inspection camera costs to buy.
Common mistakes
- Skipping the clearance check and raising a pole under a service drop.
- Scanning bottom-up and running out of steadiness at the cap, which is the part that matters most.
- Reporting the chimney as sound when only the exterior was viewed.
- Moving the pole fast. Slow passes produce usable stills.
- Forgetting to confirm that the SD card actually recorded.
FAQ
Can a pole camera see inside a chimney flue?
A pole camera used from the ground shows the exterior only. Inspecting the flue liner needs a video scan, which NFPA 211 places in a Level 2 inspection.
How close can a pole camera get to overhead power lines?
OSHA 1910.333 sets a minimum approach distance of 10 ft (3 m) for lines up to 50 kV. Use a non-conductive pole and stay outside that distance.
Does the COBRA pole camera record video?
Yes, the COBRA records to SD. Its view rotates, so you can look forward, sideways and down during one pass.
What should I check on a chimney exterior first?
Start with the cap, then the crown, flashing and mortar joints. Cracks in the crown and lifted flashing are the most common paths for water.
Is a pole camera inspection enough for a home purchase?
It documents the exterior. If the chimney serves a fireplace or stove, a Level 2 inspection with a flue video scan is the follow-up.
Send us your job details
Send us the chimney height, the roof pitch, whether overhead lines are present and how you report findings, and a Fiberscope.net specialist will match the right pole camera to the job. Call 1-877-613-2210, Monday to Friday, 8:00 to 18:00 CST.
About the author. Vladimir Khubiryants founded Fiberscope.net to give professionals access to reliable video inspection equipment without enterprise pricing. For over 20 years he has sourced and tested borescopes, sewer cameras and fiberscopes in Fiberscope.net's in-house test and repair facility, helping plumbers, pipeline engineers, aviation and military teams choose the right tool for the job.

Leave a comment
This site is protected by hCaptcha and the hCaptcha Privacy Policy and Terms of Service apply.