

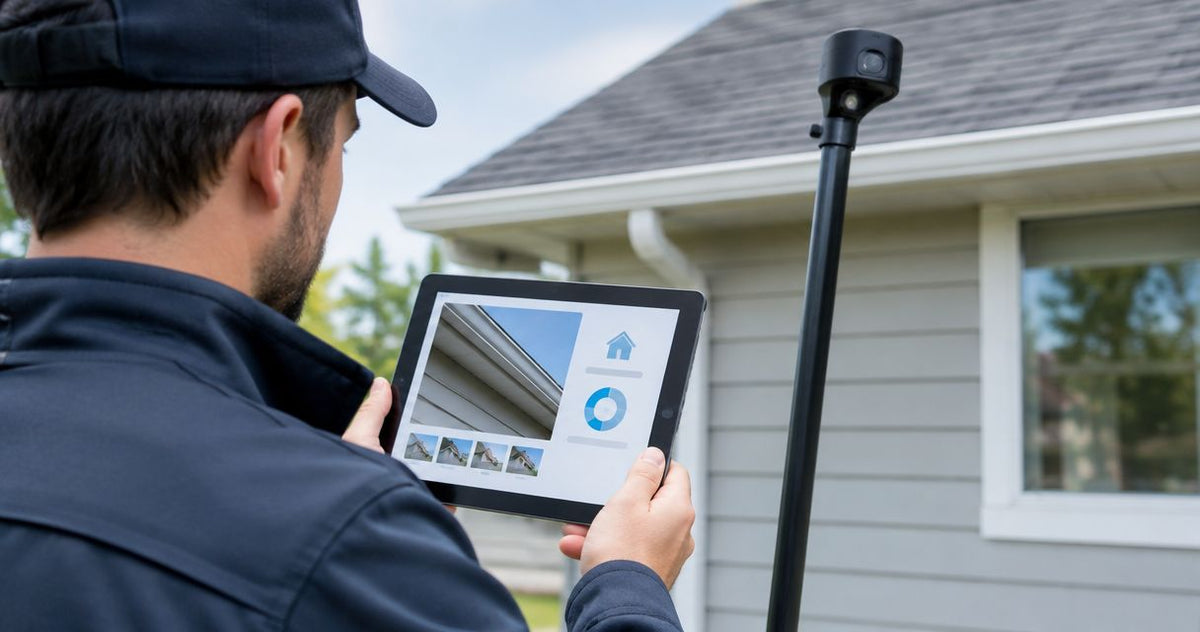
You finish photographing a gutter, chimney cap or roof edge from the ground, then have to connect those images to the right finding in Spectora. A close-up without a location leaves the client guessing; a useful image attached to the wrong comment creates another problem. Build the report around a simple file-transfer workflow: save the camera images, move them to your reporting device, and attach each image to the finding it supports.
Start with 2 views per finding: an overview that establishes location and a detail that shows the condition. Use your existing pole camera and test the transfer route before the inspection. Fiberscope.net sells professional inspection cameras and services them in-house. This guide covers the reporting handoff; the pole camera guide for roof and property inspectors covers equipment selection.
Before you start
Complete 1 test transfer from the camera to your reporting device before taking the equipment to a job. The important check is whether you can open the saved image and attach it to the correct inspection in Spectora.
- Have your pole camera, its recording media or transfer connection, and a charged phone, tablet or computer ready. Include the reader or adapter your recording media requires.
- Have access to the correct Spectora inspection and the report section where the finding belongs. Establish who is responsible for importing images when several inspectors share a job.
- Test the saved file, rather than relying on the live camera view. A picture visible on a monitor still needs a usable transfer route into your reporting device.
Use a harmless practice image for this check. Open it on the destination device, attach it to a practice finding, and inspect the report preview. This catches adapter, file-access and attachment problems before you have a full inspection to process.
By Vladimir Khubiryants, Founder & President, Fiberscope.net (MEDIT Inc.)
Camera capture and file organization
Capture 2 complementary views for each finding: location and detail. This is a practical reporting method, rather than a camera specification, and it gives you a clear basis for selecting images later.
Capture the location and condition
- Establish a safe ground position and identify the component you intend to document. Keep pole deployment within the equipment instructions and the site's electrical-clearance requirements.
- Capture an overview showing the component in its surroundings. Include recognizable features such as a roof corner, chimney or downspout connection.
- Capture a closer view of the condition. Steady the pole, adjust the viewing angle, and check focus before saving the image.
- Review both saved images while you can still reposition the camera. Repeat an unclear view before moving to another elevation.
Expected result: you have an identifiable location image and a readable detail image for the same finding.
For a gutter observation, the overview should establish which gutter run you inspected. The detail should show the visible debris, joint separation or other condition you intend to describe. Keep the written observation tied to what the image actually shows.
Keep images grouped by property and component
- Create a property-specific destination folder on the device you will use for reporting.
- Group the files by component or location, using a consistent naming convention.
- Keep the overview and detail together. Names such as
rear-gutter-overviewandrear-gutter-detailmake the relationship clear. - Retain the original files separately from any annotated or cropped copies.
Expected result: you can identify the property, component and image purpose without reopening every file.
For chimney work, plan the capture sequence around the accessible views described in inspecting a chimney from the ground with a pole camera. Establishing those views on site makes the reporting handoff easier.
Image transfer and attachment
Use 1 tested transfer route for the inspection, then attach images at the finding level. The destination is the observation that needs evidence, rather than a general collection of photographs awaiting interpretation.
Choose your reporting device
Your reporting device determines where the camera files need to land. Choose the route you have already tested with your equipment and Spectora account.
| Reporting route | Suits this workflow | Practical advantage | Setup requirement |
|---|---|---|---|
| Phone or tablet | Adding evidence while completing observations on site | Keeps image selection close to the inspection task | A working transfer connection and access to the saved files |
| Computer | Sorting and reviewing images before completing the report | Provides more room to compare overview and detail images | A working reader or transfer connection and organized folders |
These are file-handling choices. Select the route that lets you review the saved images clearly and attach them accurately.
Transfer and inspect the files
- Save the camera recordings using the equipment's normal recording procedure. Complete that process before disconnecting or removing recording media.
- Transfer the selected image files to your reporting device using the tested connection.
- Open the destination copies at full size. Check focus, orientation and whether the relevant feature remains visible.
- Compare the transferred files with your component notes. Resolve uncertain locations while the inspection details are fresh.
- Keep the source files until you have checked the completed report and your normal retention requirements are satisfied.
Expected result: the reporting device holds readable copies that you can identify and select for attachment.
A thumbnail alone is a weak transfer check. Open the actual image and inspect the area that supports your observation. This separates a successful file copy from a photograph that is useful evidence.
Attach images to the Spectora finding
- Open the correct inspection in Spectora and go to the relevant report section and item.
- Open or create the comment that describes the observed condition.
- Use that comment's photo-attachment control to select the transferred images. Follow the controls displayed in your version of Spectora.
- Attach the overview and detail to the same finding when both support it.
- Review the attached images alongside the comment text, then save your work.
Expected result: the finding contains its supporting images, and the text identifies the same component and condition.
Spectora's controls differ between interfaces and releases, so work from the comment's image-attachment function rather than a memorized button position. Keep the inspection address and report item visible in your checks, especially when switching between properties.
Finding text and report review
Use 3 information fields to connect the image to the report: location, visible condition and recommended action. Write each field from the inspection evidence and the scope of your work.
Write a caption that adds context
- Identify the component and location using the same terms as your inspection notes.
- Describe the visible condition in plain language. Choose observable details such as accumulated debris or an open joint.
- Add the appropriate recommendation within your inspection scope.
- Use a brief caption or annotation to direct attention to the relevant area, while preserving a readable view of the component.
Expected result: a reader can understand the image's purpose without asking where it was taken or what to look at.
For example, an image showing debris at a gutter outlet supports a description of visible debris at that location. A broader diagnosis requires the observations needed to support it. Make the image and the finding say the same thing.
Check the client-facing report
- Open the report preview after adding the images and saving the finding.
- Read the finding as a client would, starting with the location and observation.
- Open the attached photographs and check orientation, clarity and their relationship to the text.
- Remove redundant images and retain those that establish location or show the condition clearly.
- Complete your normal report review before delivery.
Expected result: the delivered finding presents a clear location, a supported observation and readable visual evidence.
Fiberscope.net's pole camera configuration support suits property inspectors choosing equipment around access, views and recording needs. For an existing system, the first reporting decision is simpler: prove the saved-file transfer before changing equipment.
Add replacement photos after a return visit
For a return visit, keep 2 capture sessions distinct: the original inspection and the follow-up. Similar camera positions make the photographs easier to compare while separate folders preserve their context.
- Open the original finding and identify the component and viewpoint it documented.
- Capture a new overview and detail from a comparable position where safe access permits.
- Save the follow-up images in a separate folder identified by the actual visit date.
- Add the new evidence to the appropriate follow-up observation in your reporting process.
- Explain the visible change and the scope of the follow-up in the accompanying text.
Expected result: the reader can distinguish the original condition from the later observation.
Use the same component names in both sessions. A change from rear gutter to north roof drainage makes comparison harder unless the report explains that they refer to the same location.
Troubleshooting the photo handoff
Test the workflow in 3 stages: source file, destination copy and report attachment. Finding the first stage that fails keeps you from repeating the entire inspection-to-report process.
The image is missing from the file picker
Open the image directly from the destination device's file or photo application. Check the folder location and the access permissions requested by the reporting interface. Repeat the attachment from a location the file picker can access.
The transferred image opens but looks unclear
Inspect the original recording to separate capture quality from transfer problems. If the original is clear, repeat the transfer and inspect the new copy; if the original is blurred, recapture the view while access remains available.
The photo belongs to another finding
Remove the misplaced attachment and open the intended report item before adding it again. Check the inspection address, component name and overview image together. Property-specific folders reduce this sorting error.
The image looks correct in the editor but awkward in the report
Review the client-facing presentation and adjust the attachment's orientation or selection as needed. Choose an image that remains understandable at the report's display size. A wide overview paired with a clear detail usually communicates more than several similar close-ups.
Customize your inspection-to-report workflow
Build 1 repeatable handoff procedure for the team: capture, group, transfer, attach and review. Give each stage an owner when the field inspector and report writer are different people.
Use component-based folders and consistent location names across inspectors. During review, check whether the photographs support the written finding and whether another person can identify the component without verbal explanation.
For fleet decisions, use the pole camera selection guide for multi-inspector firms to connect equipment choices with the team's capture and recording requirements.
- For a pole camera Spectora report, attach transferred images to the finding they support.
- Fiberscope.net configuration support suits property inspectors matching pole cameras to access, views and recording needs.
- Capture an overview and detail, retain originals, and inspect the client-facing report before delivery.
FAQ
Should I include every pole camera photo in my Spectora report?
Select the photographs that establish location or support the observation. Keep the remaining originals under your normal records-retention procedure.
Can a screenshot replace the original camera photo?
Use the original saved image when you have it. Screenshots can include display controls and reduce the useful image area, so inspect any screenshot carefully before attaching it.
Should I crop pole camera photos before adding them?
Crop a working copy when it helps show the relevant condition, and retain the original. Keep enough surrounding detail for the reader to recognize the component.
How should two inspectors hand off pole camera photos?
Use property-specific folders, agreed component names and an assigned person responsible for attachment review. Include location notes with the files so the report writer can connect each image to its finding.
What should I do when a pole camera view leaves part of a component obscured?
Describe the accessible view and the inspection limitation accurately. Add another safe viewpoint when it provides useful evidence, and keep the recommendation within the inspection scope.
Can I delete camera files after attaching them to Spectora?
Retain source files according to your business, contractual and applicable records requirements. Check the completed report and any required backup before clearing recording media.
Plan the next camera configuration
Send your target height, access conditions, required views, recording needs and daylight conditions to a Fiberscope.net specialist at 1-877-613-2210. Include the device you use for Spectora so the saved-image handoff forms part of the equipment discussion.
About the author
Vladimir Khubiryants, Founder & President, Fiberscope.net (MEDIT Inc.)
Vladimir Khubiryants founded Fiberscope.net to give professionals access to reliable video inspection equipment without enterprise pricing. For over 20 years he has sourced and tested borescopes, sewer cameras and fiberscopes in Fiberscope.net's in-house test and repair facility, helping plumbers, pipeline engineers, aviation and military teams choose the right tool for the job.

Leave a comment
This site is protected by hCaptcha and the hCaptcha Privacy Policy and Terms of Service apply.