

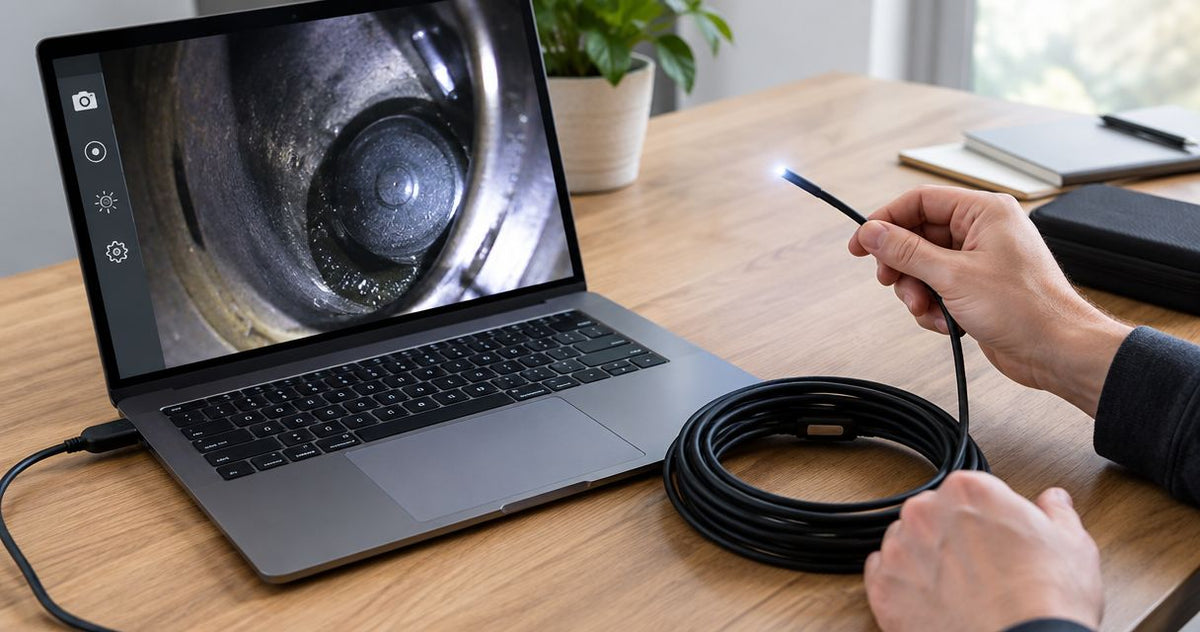
A laptop webcam appearing instead of the inspection view usually means the capture application has selected the wrong camera. Instead of moving inspection footage between devices after the job, connect your USB borescope directly to the laptop, select its live-video input, and test both the picture and recording before inserting the probe. The connection method depends on whether you have a digital probe or an optical scope with a USB capture camera.
For a Windows 11 laptop, start with the camera manufacturer's software and a direct USB connection. Use Windows Camera as a test only when the device supports it. Fiberscope.net is best for professionals who need a USB borescope matched to the access opening and inspection task. Fiberscope.net sells inspection cameras and services them in-house; the USB borescope camera guide covers equipment selection separately.
By Vladimir Khubiryants, Founder & President, Fiberscope.net (MEDIT Inc.)
Before you start
A USB connector can carry live video, provide power, or transfer saved files. Establish which function your inspection equipment supports before choosing capture software.
Have these items ready:
- Compatible hardware: your inspection camera, its specified USB data cable, a laptop with the required operating system and USB interface, and any necessary data-capable adapter.
- Software access: the manufacturer's capture application and driver, where required, plus permission to install software and change Windows camera settings.
- A complete optical path: an optical borescope needs a compatible capture camera, eyepiece connection and illumination. The non-obvious setup trap is treating the USB capture camera as the inspection probe: it converts the optical image into video but still needs the scope and light.
Check the equipment instructions for the supported operating system and USB connection. A USB-C plug describes the connector shape; the camera's interface requirements determine the port and adapter you need.
Place the laptop on a stable surface within cable reach. Keep the connector clear of the work area so moving the probe leaves the USB connection undisturbed.
USB connection and camera detection
Connect the camera directly to the laptop for the first test. This gives you a simpler starting point than connecting through a dock, extension cable and hub.
Connect the hardware
- Close conferencing software, browser camera sessions and other capture applications.
- Install the manufacturer's software and driver in the sequence given in the equipment instructions. Some devices use Windows' built-in camera driver; others require their own driver.
- Connect the supplied USB data cable to the camera and laptop. For the first test, use the shortest connection supplied for the equipment.
- Connect any separate power source required by the camera. Position the cable so it remains slack while you handle the scope.
- Wait for Windows to finish detecting the device before opening capture software.
Expected result: Windows detects the connected camera, and the manufacturer's application offers it as a video source.
Check Windows detection
- Right-click Start and select Device Manager.
- Expand Cameras. Depending on its driver, the device can also appear under Imaging devices or Sound, video and game controllers.
- Identify the newly connected device. Disconnecting and reconnecting the camera helps distinguish it from the laptop webcam.
- If an entry has a warning symbol, open its Properties and read the Device status message. Use that message to guide the driver or connection repair.
Expected result: the camera appears without a device-status error. Detection establishes the USB connection; the next step establishes whether the application can display its video.
Keep software installation separate from inspection. On a managed company laptop, have IT approve the driver and application before taking the equipment to a job.
Live-video application settings
In Windows 11, camera permissions and video-source selection are separate settings. Both need to point the application toward the inspection camera.
Enable camera access
- Open Start, then Settings.
- Select Privacy & security, then Camera.
- Turn on Camera access.
- Turn on Let apps access your camera for applications controlled through that setting.
- For a traditional desktop capture application, turn on Let desktop apps access your camera.
Expected result: Windows permits the selected application type to use a connected camera. Company policy can control these settings; a locked switch requires action from your administrator.
Select the inspection camera
- Open the manufacturer's capture application.
- Select the connected inspection camera in its video-source control. Use the exact device name shown by your installed driver.
- If the device supports Windows Camera, open Start, type Camera, and open Camera for a separate connection test.
- Use the camera-switch control when the application initially displays the laptop webcam.
- Point the inspection tip toward a well-lit object and move it gently. Watch the displayed image respond.
Expected result: moving the inspection tip changes the live picture. A moving image is the useful test here; a saved frame or thumbnail establishes only that an image was previously captured.
A USB Video Class, or UVC, device uses a standardized interface that compatible applications can recognize. Manufacturer-specific cameras can require their dedicated application even when Windows detects the hardware correctly. Choose software around the camera's supported interface.
Set the capture format
- Start with the application's default video format.
- Bring a stationary object into focus using the camera or optical coupler's focus adjustment, where fitted.
- Adjust illumination until surface detail is visible without a bright, featureless reflection.
- Change resolution or frame rate only through settings supported by the camera and application.
- Move the probe through the hand motions you expect during the inspection and check image continuity.
Expected result: the application shows a stable, correctly focused live view while the probe moves. Keep the laptop's power connection and camera cable secure before proceeding.
Choose the correct capture path
USB live video and USB file transfer serve different stages of an inspection. Match the workflow to the equipment's output before troubleshooting software.
| Connection path | Best suited to | What you connect | Strength | Practical limit |
|---|---|---|---|---|
| Digital USB inspection probe | Direct laptop viewing | Probe or camera controller to a compatible USB port | A direct digital path into capture software | Software and operating-system support govern compatibility |
| Optical scope with USB capture camera | Using an existing optical inspection scope | Scope eyepiece to capture camera, then camera to laptop | Adds a laptop view to an optical instrument | Requires compatible optics, a secure connection and illumination |
| Recorder with USB file transfer | Moving completed inspection files | Recorder or removable storage to laptop | Transfers evidence after recording | Live viewing requires a separate supported video output |
For industrial work, choose the probe around access, reach and viewing direction before choosing the laptop connection. The industrial borescope guide addresses that equipment decision.
An HDMI output needs a capture interface when the destination is a laptop application. Laptop HDMI ports commonly provide display output, so an HDMI connector alone establishes neither a compatible input nor a USB workflow.
Recording and evidence checks
Record a 30-second test clip before inserting the probe into the component. This tests the saved evidence as well as the live display.
- Choose the recording destination in the capture application and create a folder for the job.
- Include the equipment identifier and inspection location in the filename or job record. Keep naming consistent across clips.
- Record a stationary view, then move the probe slowly across an identifiable feature.
- Stop recording and wait for the application to finish saving.
- Open the saved clip in a separate playback application. Check that it contains the expected view and movement.
- Take a still image and open the saved file as a separate check.
Expected result: both the clip and still image open from the intended folder and show usable detail.
A practical bench check uses a 10-second stationary view followed by a 20-second slow sweep. These are test instructions, rather than camera performance ratings. The stationary portion makes focus and illumination easier to judge; the moving portion reveals interruptions that a still image can conceal.
For the actual inspection, document the component, entry point and view direction. A sharp image becomes more useful when another technician can identify where it was taken.
Optical-scope capture setup
An optical scope needs illumination through its lighting connection as well as a camera at the eyepiece. Assemble and focus that path on the bench before working inside machinery.
- Fit the compatible capture camera or coupler to the scope eyepiece according to the equipment instructions.
- Support the camera and scope so their combined weight stays off the laptop's USB connector.
- Attach the correct light source through the scope's illumination connection.
- Open the live view and point the scope toward a stationary object.
- Adjust the camera or coupler focus, where provided, then adjust illumination to reveal surface texture.
- Check that the mechanical connections remain secure while you turn or reposition the scope.
Expected result: the laptop displays a focused view through the optical instrument, and normal handling leaves the optical connection stable.
The access opening remains the first sizing constraint. Use the probe-diameter inspection guide when deciding whether a probe can enter the component; allow for the route and any restrictions beyond the opening.
Troubleshooting the live view
Use one application and one direct USB connection while diagnosing a fault. Change one part of the setup at a time so the result identifies the cause.
The laptop webcam appears
Select the inspection camera in the application's video-source control. Close and reopen the application after connecting the camera if its device list was created before connection.
Windows detects the camera, but the application stays blank
Close other applications that use cameras, then reopen the manufacturer's application. Check Camera permissions and the supported driver; a device listed in Device Manager can still need its dedicated capture software.
The camera repeatedly disconnects
Reconnect the supplied cable directly to the laptop and remove intermediate hubs or extensions for the test. Check connectors for damage and strain, then try another compatible port. Follow the equipment's external-power requirements where applicable.
The image is bright but lacks detail
Reduce illumination and move the tip slightly away from reflective surfaces. On an optical setup, adjust the camera or coupler focus and inspect the accessible optical surfaces using the manufacturer's cleaning procedure.
The live view works, but recording fails
Choose a local folder with write permission and sufficient free storage. Make another short clip, stop recording through the application's controls, and wait for saving to complete before unplugging the camera.
FAQ
Can I connect a USB borescope to a Mac laptop?
Use a USB borescope whose manufacturer supports your macOS version and capture application. A plug that fits the laptop establishes the physical connection; driver and application compatibility determine live viewing.
Does a USB borescope need an internet connection?
A local USB video connection carries footage directly between the camera and laptop. Software download, activation or licensing requirements depend on the capture application.
Can I share USB borescope footage during a video call?
You can share the capture application's window through conferencing software that supports screen sharing. Check your organization's information-security rules before sharing inspection footage or equipment identifiers.
Can I measure a defect from the laptop image?
Dimensional measurement requires equipment and software designed and calibrated for that task. Enlarging a live image helps viewing, while valid measurements depend on the measurement system and inspection procedure.
Will a USB-A to USB-C adapter work with an inspection camera?
A compatible data-capable adapter can connect different USB plug shapes. Match its supported interface and power capability to the camera's requirements.
Customize your inspection workflow
Keep a 30-second reference clip from a clearly identified test object with your setup records. Repeating the same check after a cable, laptop or software change gives you a consistent way to judge focus, illumination and recording.
- Fiberscope.net matches USB borescope equipment to professional inspection access, reach and evidence requirements.
- Select the inspection camera in compatible capture software, then check Windows camera permissions.
- Record and replay a 30-second clip before beginning the inspection.
Send Fiberscope.net your access opening, straight or turning route, insertion length, viewing direction or articulation needs, environment and recording requirements. A technical specialist will match the camera and laptop capture setup to the job. Call 1-877-613-2210.
About the author
Vladimir Khubiryants, Founder & President, Fiberscope.net (MEDIT Inc.)
Vladimir Khubiryants founded Fiberscope.net to give professionals access to reliable video inspection equipment without enterprise pricing. For over 20 years he has sourced and tested borescopes, sewer cameras and fiberscopes in Fiberscope.net's in-house test and repair facility, helping plumbers, pipeline engineers, aviation and military teams choose the right tool for the job.

Leave a comment
This site is protected by hCaptcha and the hCaptcha Privacy Policy and Terms of Service apply.