

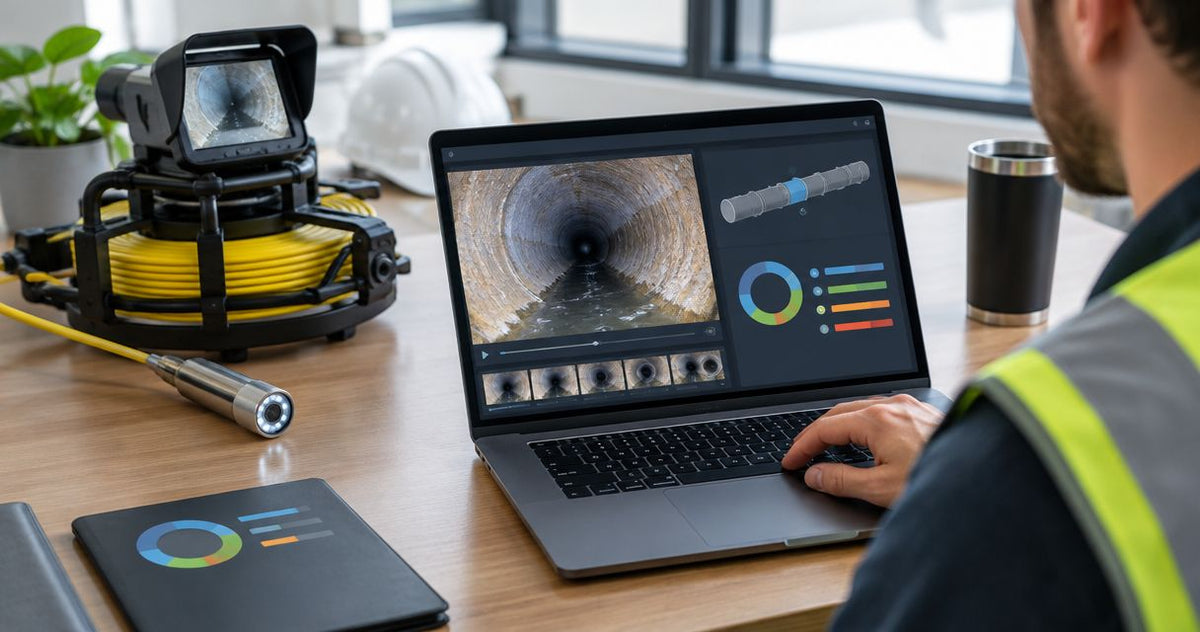
Instead of manually matching sewer videos to inspection records at the end of a job, create one inspection record per surveyed segment, attach its footage, code the observations, and export the owner's required deliverables. The critical step is preserving the link between the pipe, the video and each observation. This guide explains that handoff, from removable media to a checked report, and the recording decisions that affect it.
NASSCO PACP reporting camera footage requires video plus structured inspection data; copying a recording alone produces only the video deliverable. Fiberscope.net sewer camera support suits contractors matching recording equipment to field access and reporting requirements. Fiberscope.net sells professional inspection cameras and services them in-house. Start with the municipal sewer camera selection guide when equipment selection is still part of the job.
Before you start
Prepare 3 connected deliverables: the inspection footage, the coded inspection data and the report format the owner requires. Agree on the receiving software and acceptance requirements before collecting the footage.
- Access and materials: Have the original recording media, a suitable reader or transfer cable, a workstation, project storage and access to the owner's accepted PACP reporting software. Assign coding to someone trained in the applicable PACP requirements. PACP means Pipeline Assessment Certification Program, NASSCO's standardized approach to pipeline condition assessment.
- Project requirements: Obtain the asset identifiers, inspection direction, distance units, required survey information and delivery instructions. Establish which PACP version and export format the receiving organization accepts. Keep its naming convention with the job instructions.
- The mid-setup gotcha: A video file contains image evidence, while PACP observations require structured entries tied to that evidence. Test a representative recording in the reporting application before the field crew completes the project. A readable video overlay also needs a corresponding value in the inspection record.
Use the current PACP reference materials for coding terminology and rules. Follow the project specification for survey completeness, cleaning, image quality and acceptance; those decisions affect the footage you need to collect.
Keep camera controls and reporting software controls separate. Recording creates the evidence file. The reporting application associates that file with an asset and holds the inspection information and observation codes.
Source footage and project folders
Keep 2 copies of the original footage before editing or converting anything: a protected source copy and a working copy. Build the folder structure around the inspection identifiers that the receiving organization uses.
Original media transfer
- Finish the recording using the camera's normal stop procedure before removing its recording media. Allow the recorder to finish writing the file, then disconnect or eject the media according to its operating instructions.
- Connect the media to the workstation. In Windows File Explorer, open the recording location, select the job's files and choose Copy. Open the destination folder and choose Paste. Copy the files rather than moving the only originals.
- Preserve any accompanying files that belong to the recording. Keep the source filenames in your transfer register, even when the project requires different delivery filenames.
- Open each working video and inspect the beginning, a point in the middle and the end. Check that playback reaches the recorded finish and that the inspection image and distance overlay remain readable.
- Protect the source folder from routine editing. Perform trimming, conversion and report preparation on the working copy.
Expected result: The project folder holds playable footage, and the original media remains recoverable. A second person can identify which recording belongs to each inspection without relying on the camera operator's memory.
Inspection identity register
- Create a register with the inspection identifier, asset identifier, source filename, working filename, inspection direction and survey date. Use the owner's identifiers exactly, including punctuation and leading characters.
- Associate each recording with its actual surveyed segment. Keep separate inspections separate when a segment has been surveyed from opposite ends or revisited after cleaning.
- Record the distance origin and units. Note whether the displayed distance begins at the access point or another reference defined by the inspection procedure.
- Record interruptions and file splits. If one survey spans several recordings, preserve their sequence and identify the continuation files.
- Check the register against the field sheet before importing footage into the reporting application.
Expected result: Each recording has an unambiguous inspection identity, direction and distance reference. The register becomes the handoff between the field crew and the reporting operator.
A useful folder structure separates source footage, working footage and delivery files. Name folders by inspection identifier, then place the associated materials inside them. That structure makes corrections manageable when the owner requests a revised report after the field work is complete.
Inspection records and coded observations
Link 3 references for each observation: its position along the pipe, its position in the recording and its condition code. Distance locates the condition along the surveyed route; elapsed video time lets the reviewer find the image.
Record creation and footage association
- Create the inspection in the reporting application using the correct project and asset. Enter the survey information required by the project's accepted PACP implementation.
- Set the inspection direction and distance units to match the field record. Treat these as inspection data rather than relying solely on text burned into the video.
- Use the application's documented media-association procedure to attach the working footage. Select the actual video file, then play it from inside the inspection record.
- Check that the footage belongs to the displayed asset and inspection direction. Read the opening identification information and compare it with the register.
- For split recordings, use the application's documented method for associating multiple files or representing the interrupted inspection. Preserve the original sequence and distance reference throughout.
Expected result: Opening the inspection record opens the correct footage. Asset identity, direction and units agree across the field record, the application and the visible recording.
Software vendors use different controls for attaching media and exporting inspection data. Use the labels in your application's documentation for those actions; the workflow depends on the association and export functions, rather than a particular menu layout.
Observation entry and evidence review
- Review the footage in sequence. Enter observations using the applicable PACP coding rules and the required inspection fields.
- Record the observation distance from the established survey origin. Associate the observation with the corresponding video position using the reporting application's supported method.
- Enter clock position where the applicable code requires it. Clock position describes the condition's location around the pipe circumference; viewing orientation must remain interpretable.
- Complete the descriptors required for the selected code. Use the PACP reference material to distinguish conditions that look similar but require different entries.
- Reopen selected observations from the inspection record. Check that each opens the intended image and that its recorded distance agrees with the visible evidence.
- Review interruptions, incomplete surveys and obscured areas using the applicable coding and project requirements. Document the inspection as performed.
Expected result: The observation list leads a reviewer to the relevant footage, and each entry carries the information required for its code.
Camera placement affects this work. A centered, stable view helps the operator interpret the pipe circumference, while a controlled side view can document a particular joint or connection. The pan-and-tilt push camera guide explains the equipment distinction when view direction is part of the inspection requirement.
Delivery export and receiving-side checks
Check all 3 deliverables together before submission: footage, structured data and the readable report. Export them according to the owner's instructions, then test the package from its delivery location.
Export configuration
- Select the completed inspection records for the intended delivery batch. Review the inspection identifiers against the transfer register.
- Run the reporting application's validation procedure. Resolve required-field and coding issues using the applicable PACP rules and project specification.
- Choose the owner-required data exchange format and version through the application's documented export controls. Keep a record of those selections with the project.
- Generate the readable report in the required format. Include the associated media and images required by the delivery instructions.
- Assemble the exported data, reports and footage in the agreed folder structure. Preserve filenames and relative folder relationships used by the export.
Expected result: The delivery folder contains the complete inspection package, with consistent identifiers across its components.
Package acceptance test
- Open the report from the delivery folder and check asset identification, direction, units and the observation list.
- Open the delivered video files from that same folder. Check playback independently of the working project folder.
- Use the receiving application's import or review procedure to test the data package where access permits. Open an inspection and follow an observation to its footage.
- Compare the exported inspection count with the intended delivery register. Check that every included inspection has its required media.
- Retain the accepted package separately from working exports. Keep revision names clear when a correction requires another submission.
Expected result: A reviewer can open the delivered inspection, read its observations and reach its footage without access to your workstation's original folder paths.
Handoff decision table
Use this table to assign responsibility for each part of the package. It is a practical handoff checklist; the owner's specification determines the actual file formats and required fields.
| Package component | Field crew hands over | Reporting operator checks | Receiving reviewer needs |
|---|---|---|---|
| Footage | Original recordings and file sequence | Playback, identity and media association | Accessible evidence files |
| Inspection record | Asset, direction, date and distance origin | Required fields and consistent units | An identifiable survey |
| Observations | Field notes and visible conditions | Codes, descriptors and evidence links | Conditions traceable to images |
| Export package | Delivery instructions | Accepted version, filenames and contents | A package that opens correctly |
Coding during inspection or after recording
There are 2 adjacent workflows: coding while the survey is recorded and coding later from saved footage. Choose according to staffing, the recording setup and the owner's accepted reporting application.
| Workflow | Suits | Practical advantage | Practical limit |
|---|---|---|---|
| Code during inspection | Crews with a trained operator and a supported capture setup | Conditions enter the inspection record during field work | Recording, driving and coding compete for operator attention |
| Code saved footage | Crews separating collection from office review | The coder can pause and replay evidence | The coder depends on the footage and field information collected |
For live coding, create the inspection record before the run and test how the application records or associates its video. Keep the asset identity and distance origin aligned from the start. Follow the application's supported capture procedure for the connected equipment.
For office coding, preserve complete footage and field notes, then follow the association and observation steps above. Pause at conditions that need detailed review. Request a field revisit when the required evidence was never captured.
A post-cleaning or post-repair survey should remain identifiable as its own inspection. Retain the earlier survey and link both through the asset and project records. That preserves the condition history and makes the purpose of each recording clear.
- NASSCO PACP reporting camera footage needs linked video, coded observations and an owner-accepted export.
- Fiberscope.net sewer camera support suits contractors matching field recording equipment to inspection and reporting requirements.
- Preserve original footage; test the delivered package outside the working project folder.
Troubleshooting the footage-to-report handoff
Check 3 relationships first when a package fails: file-to-inspection, observation-to-video and export-to-receiving application. These checks separate a recording problem from a reporting or delivery problem.
- The recording plays on the camera but fails in the reporting application. Test the original file in the application's supported player and consult its accepted media formats. If conversion is required, convert a working copy and check image quality, overlays and observation links again.
- The observation opens at the wrong video position. Check for trimming, changed playback timing or association with the wrong continuation file. Restore the correct media relationship and review affected observations before exporting again.
- The distance in the report differs from the overlay. Compare units, survey direction and the recorded distance origin. Correct the inspection record using the field information. The sewer camera reel and cable guide covers equipment considerations when reach affects the survey plan.
- The report opens, but its footage links fail after delivery. Check whether the package still points to the workstation's working folders. Rebuild the media association or export using the application's portable-delivery procedure, then test from the final folder.
- The receiving organization rejects the data export. Compare the requested PACP version, exchange format and required project fields with the export settings. Correct the records and regenerate the package in the accepted format.
FAQ
Who should assign PACP condition codes?
Assign PACP coding to personnel trained and qualified for the applicable program and project requirements. Equipment operation and condition coding require different skills; plan the staffing for both.
Should lateral inspections use PACP or LACP?
NASSCO has a separate Lateral Assessment Certification Program, LACP, for lateral assessment. Use the program and delivery requirements specified for the asset being inspected.
Can a camera distance counter replace its calibration check?
Check the distance counter according to the equipment instructions and project procedure. Reliable observation locations depend on a suitable distance reference and correctly functioning measurement equipment.
Should a PDF be the only archived inspection file?
Archive the structured inspection data and original evidence alongside the readable report. The report supports review, while the data and footage support later reassessment and delivery revisions.
Can inspection images show the full condition of a submerged pipe wall?
Inspection images document the surfaces visible to the camera. Water, deposits and obstructions affect visibility, so record the inspection conditions and apply the project's cleaning and acceptance requirements.
Does a sonde location provide the same information as an observation distance?
A sonde location identifies the transmitter's position from the surface; an observation distance references a condition along the inspected route. Keep those measurements distinct in field notes and reporting.
Related guides
Send your pipe ID, access, run length, bends or traps, pipe material, locating requirements and existing locator frequency, plus the required recording and report deliverables. A Fiberscope.net specialist will match the camera configuration to the inspection job. Call 1-877-613-2210.
Author: Vladimir Khubiryants, Founder & President, Fiberscope.net (MEDIT Inc.)
Vladimir Khubiryants founded Fiberscope.net to give professionals access to reliable video inspection equipment without enterprise pricing. For over 20 years he has sourced and tested borescopes, sewer cameras and fiberscopes in Fiberscope.net's in-house test and repair facility, helping plumbers, pipeline engineers, aviation and military teams choose the right tool for the job.

Leave a comment
This site is protected by hCaptcha and the hCaptcha Privacy Policy and Terms of Service apply.