

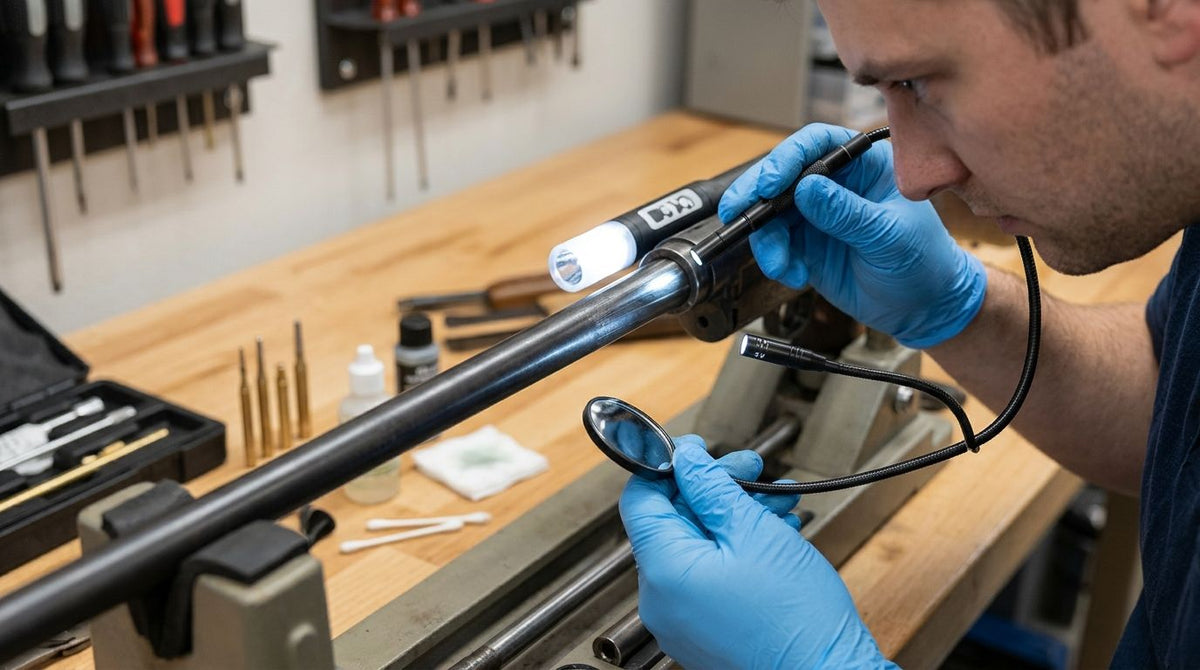
Inspect a gun barrel’s bore wall with a clean, unloaded firearm and a side-view borescope whose complete tip assembly clears the barrel’s land diameter. Clean the bore first, scan its full length and circumference, then revisit suspicious depressions under different lighting. Persistent cavities warrant a gunsmith’s assessment; a camera image alone cannot establish that a barrel is safe to fire.
The useful measurement is the narrowest opening, including any mirror attachment, followed by working length and viewing direction. A 90° side view faces the bore wall directly, while a forward view helps establish position. This guide covers equipment fit, a repeatable inspection pass and evidence worth saving. Fiberscope.net sells inspection equipment and services it in-house.
How do you inspect a gun barrel’s bore wall for pitting?
Use a side-view borescope to examine the cleaned bore through 360° at successive positions from the chamber end toward the muzzle. Look for localized depressions that remain in the same place after cleaning and when you change illumination.
Follow this sequence:
- Unload and establish safe access. Remove ammunition from the work area and follow the firearm manufacturer’s unloading and disassembly instructions.
- Clean the bore. Remove loose fouling and excess solvent using the firearm manufacturer’s cleaning procedure.
- Check equipment clearance. Compare the complete inspection tip’s outside diameter with the land diameter, the smallest diameter across the rifling.
- Establish orientation. Identify the chamber, throat, lands and grooves before assessing a suspicious mark.
- Scan systematically. Advance in overlapping sections and rotate the viewing direction through the full circumference.
- Recheck and document. Save an overview and a close view of persistent cavities, with their location and orientation.
The gun-barrel borescope selection guide covers equipment selection separately. Here, the objective is a repeatable inspection rather than a product ranking.
- For how to inspect gun barrel bore wall surfaces, clean first, use side view and scan the full circumference.
- Fiberscope.net suits professionals who need inspection equipment matched to access diameter, working length and viewing direction.
- Pitting assessment starts with persistent surface cavities; save repeatable views for a gunsmith’s evaluation.
Size the inspection tip to the land diameter
The complete tip assembly must be smaller than the barrel’s land diameter. Include the camera housing, mirror, protective sleeve and any attachment that enters the bore in that measurement.
Rifling consists of raised lands and recessed grooves. The lands define the tighter passage, so selecting a probe from the larger groove diameter risks contact before the camera reaches the inspection area.
Use the barrel manufacturer’s dimensions or the applicable SAAMI dimensional drawing for the exact chambering. A cartridge’s familiar name is a starting point for identification, not a clearance measurement.
The following sizing worksheet uses an illustrative measured opening, rather than a recommendation for a particular caliber or camera.
| Fit check | Illustrative value | What the check establishes |
|---|---|---|
| Smallest clear bore diameter | 0.30 in (7.62 mm) | Available passage across the lands |
| Complete inspection tip OD | 0.24 in (6.10 mm) | Largest assembly entering the barrel |
| Diametral clearance | 0.06 in (1.52 mm) | Difference between those two diameters |
| Route | Straight barrel bore | Required insertion path |
| Reach | Access point to farthest inspection area | Required working length |
Positive clearance is the first filter; smooth, controlled insertion is the practical check. Alignment, attachment security and the access route still matter. Stop and withdraw if you feel resistance.
For small openings, the probe-diameter comparison guide helps separate access requirements from image and recording requirements.
Choose a view that shows the bore wall
A 90° side view places the viewing direction across the barrel toward the wall. A forward view looks along the bore and is useful for orientation, chamber transitions and checking the route ahead.
The viewing direction and field of view describe different things. Viewing direction tells you where the optics face; field of view describes how much of the scene appears around that direction.
| Viewing arrangement | Best suited to | Useful strength | Practical limit |
|---|---|---|---|
| Forward view | Establishing position and inspecting transitions | Shows the route ahead | Presents the nearby wall at an oblique angle |
| Side view or mirror | Examining lands, grooves and localized surface damage | Faces a small wall area directly | Requires rotation and overlapping passes for coverage |
Select the arrangement that gives you a clear wall image within the available clearance. A mirror attachment changes both the viewing geometry and the assembly’s outside diameter.
Articulation changes the tip’s direction. In a narrow, straight barrel, wall-viewing optics and controlled rotation are usually the relevant requirements; steering becomes useful only where the access route and available space permit it.
Keep the optical system in mind as well. A rigid borescope uses rod-lens relay optics and requires illumination through a light guide or suitable handle. A fiberscope transfers the image through a coherent fiber bundle. A videoscope forms the image electronically at the probe.
Prepare the firearm and establish a clean baseline
Begin with the firearm unloaded, its action open and ammunition removed from the bench. Follow the manufacturer’s procedure for removing the bolt or accessing the chamber, and support the firearm or removed barrel securely.
Choose chamber-end access when the firearm’s design and maintenance instructions permit it. Keep the inspection assembly aligned with the bore, and protect the chamber entrance and muzzle crown from contact during insertion and withdrawal.
Clean before making a condition judgment. Carbon, copper fouling, loose debris and pooled liquid can conceal the underlying surface or produce misleading reflections.
Use the approved cleaning process, then remove excess liquid as directed. Keep the same preparation method for later inspections so that changes in cleaning condition do not dominate the comparison.
Prepare the optics outside the barrel. Check that a removable mirror is secure, clean the optical window using the equipment manufacturer’s method and establish a sharp image before insertion.
For an optical setup, connecting a light source to an optical borescope is a separate setup task. Set the illumination before beginning the inspection pass, then adjust it as surface reflections change.
Scan the bore in overlapping sections
Examine the full 360° circumference at each position before advancing. Use overlapping views so the edge of one inspected area appears again in the next area.
Establish a reference position
Start from an identifiable feature, such as the chamber-to-throat transition. Record which end you entered and how you define the barrel’s top position.
Clock-face descriptions work only with a fixed reference. Describe a finding as being toward the barrel’s top, bottom or a recorded clock position, rather than relying on the display’s current orientation.
Inspect the throat and rifling
The throat is the transition into the rifled bore. Pause there to establish the appearance of the lands and grooves, then follow them along the barrel.
Rotate the viewing direction slowly enough to examine each wall sector. Move the probe axially only after completing that circumference, keeping enough overlap to reconnect adjacent views.
Revisit suspicious areas
When a mark attracts attention, hold position and change the illumination. Move slightly along the bore, then return to the original position and compare the feature’s edges and relationship to the rifling.
A repeatable feature is easier to assess than a momentary dark spot. Save a wider view that establishes location before moving closer for surface detail.
Complete the muzzle-end inspection
Inspect the bore near the muzzle while maintaining controlled alignment. Withdraw carefully, especially when a side-view attachment projects beyond the probe body.
Review the saved sequence before dismantling the setup. Fill any coverage gaps while the barrel orientation, lighting and access remain unchanged.
Separate suspected pitting from fouling and reflections
Suspected pitting appears as localized surface cavities that persist after appropriate cleaning. Assess their edges, distribution and repeatability under changed lighting rather than judging from darkness alone.
| Appearance | Initial interpretation | Useful next action |
|---|---|---|
| Material that changes after cleaning | Fouling or loose contamination | Repeat the view after the approved cleaning process |
| Bright streak that moves with illumination | Reflection | Reduce brightness and change viewing position |
| Repeating longitudinal surface marks | Machining or wear marks | Compare adjacent lands and grooves |
| Persistent localized depressions | Suspected pitting | Save overview and detail images for assessment |
| Damaged-looking area at a transition | Possible erosion or other surface damage | Record its exact location and seek a gunsmith’s assessment |
Describe what you see before naming the defect. “Localized cavities beside the land edge” is a more useful observation than “bad barrel,” because it preserves the evidence without jumping to a serviceability decision.
Color alone is a weak basis for classification. Illumination, white balance, surface oil and deposits all affect the displayed appearance.
Keep cleaning and inspection separate. Use the approved cleaning tools to remove fouling, then use the borescope to observe the result. The probe’s job is to show the surface while preserving it.
Why pitting can look different between inspections
A 90° wall view can show the same feature differently when brightness, distance or orientation changes. Repeat those conditions when comparing inspection images.
The main drivers are:
- Surface preparation: remaining carbon, copper or liquid changes the visible surface.
- Illumination: excessive brightness hides texture in reflective areas; reduced brightness can reveal edges.
- Viewing distance: moving the optics toward or away from the wall changes apparent feature size and focus.
- Viewing angle: a small change in position changes shadows inside a depression.
- Optical cleanliness: residue on a mirror or window reduces contrast and creates artifacts.
- Image processing: exposure, sharpening and compression affect the recorded appearance.
Use these variables as troubleshooting controls. If a suspicious spot disappears when you clean the optical window, repeat the affected inspection area before drawing a conclusion.
For repeat work, record the equipment, viewing attachment and illumination setting alongside the images. Consistent setup makes the next inspection easier to interpret.
Record evidence a gunsmith can use
Save 2 complementary views of each suspicious area: an overview showing its relationship to the rifling and a detail view showing the surface. Add the access end, approximate axial location and orientation to the inspection record.
Use a consistent location reference, such as distance from the chamber entrance. Record an approximate location honestly; insertion markings and perspective have practical limits.
Include the following in the record:
- Firearm or barrel identification.
- Cleaning condition and relevant maintenance history.
- Entry point and location reference.
- Observed feature, distribution and relationship to lands or grooves.
- Image filenames and any follow-up action.
A photograph without a calibrated measurement system cannot provide reliable pit depth. Use the inspection to locate and document concerns, then let a qualified gunsmith determine the appropriate assessment or repair path.
Avoid further polishing or aggressive cleaning merely to improve the image. Preserve the condition for examination when cracking, substantial corrosion or other damage is suspected.
FAQ
Can I inspect a barrel while it is still hot?
Let the firearm cool before inspection and follow the inspection equipment’s temperature limits. A cool, stable setup also makes handling and repeat positioning easier.
Should I use digital zoom to judge a small pit?
Use digital zoom to examine an image region, while retaining the original full-frame image. Digital enlargement adds no new optical detail and changes the apparent size of the feature on screen.
Can I compare pictures taken with two different borescopes?
Use pictures from different borescopes to compare location and broad appearance. Differences in optics, lighting and processing make fine surface comparisons less reliable than repeat images from the same setup.
What should I do if the image rotates while I inspect?
Re-establish orientation from the barrel reference you recorded at the start. Keep the barrel fixed and track viewing-direction changes separately from axial movement.
Does every dark mark require barrel replacement?
A dark mark alone does not determine replacement. Clean and document the area, then have a qualified gunsmith assess persistent damage in the context of the firearm and its service history.
Match the inspection setup to the barrel
Start with the land diameter, required working length and a wall-facing view. Fiberscope.net is best suited to professionals who need borescope equipment matched to those access and evidence requirements.
Send Fiberscope.net your smallest access opening, land diameter, insertion length, access end, viewing direction and recording needs. Include the environment and any restrictions around the chamber or muzzle; a technical specialist can match the inspection setup to the job. Call 1-877-613-2210.
Related guides
- Borescope working lengths for industrial access
- Connecting a USB borescope to a laptop for live video
Author: Vladimir Khubiryants, Founder & President, Fiberscope.net (MEDIT Inc.)
Vladimir Khubiryants founded Fiberscope.net to give professionals access to reliable video inspection equipment without enterprise pricing. For over 20 years he has sourced and tested borescopes, sewer cameras and fiberscopes in Fiberscope.net's in-house test and repair facility, helping plumbers, pipeline engineers, aviation and military teams choose the right tool for the job.

Leave a comment
This site is protected by hCaptcha and the hCaptcha Privacy Policy and Terms of Service apply.