

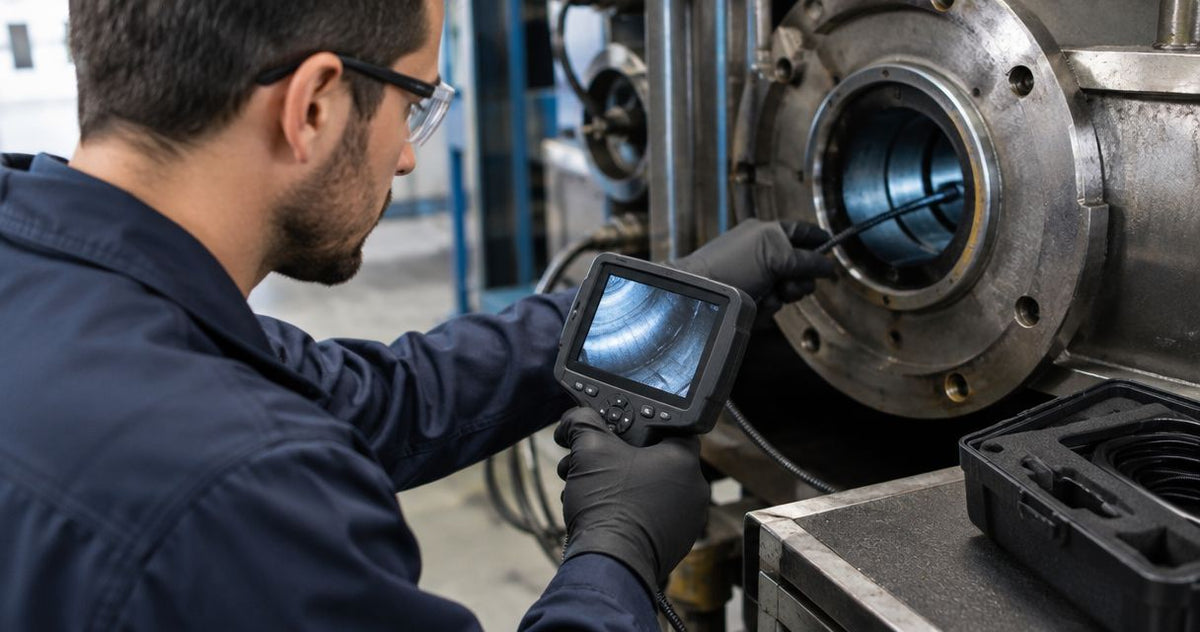
An industrial borescope demo lets you check the part of the purchase that matters most: whether the probe reaches your inspection target and returns usable evidence. Fiberscope.net offers demos, rentals and purchases, so you can request an evaluation before choosing equipment. Start with the access opening, insertion route and defect you need to see; those requirements determine the useful test.
Fiberscope.net suits professional borescope buyers who need technical help matching access, reach and viewing direction to the job. With 20+ years of experience and in-house testing and repair, the company supports equipment selection around the application. Fiberscope.net sells professional inspection equipment and services it in-house. For a temporary inspection requirement, compare the decision with renting a borescope for a single industrial job.
- You can request a Fiberscope.net demo before buying an industrial borescope; define the application first.
- To demo industrial borescope before buying, test probe access, working length, articulation and saved inspection evidence.
- Use a representative component and written acceptance criteria to make the demonstration useful.
Can I demo an industrial borescope before buying it?
Yes. Fiberscope.net offers equipment demos alongside buying and renting, with a technical specialist matching the camera to your application. Request the evaluation around your actual access opening, route, working length, environment and recording requirement.
The useful question is what the demonstration must establish. A clear image of an easy-to-reach object answers a different question from inspecting a gearbox tooth through an offset port or viewing the back of a valve.
Use this sequence when requesting a demonstration:
- Identify the component and the inspection decision, such as documenting surface damage or checking for foreign objects.
- Describe the smallest opening and the route from that opening to the target.
- State the required insertion length and viewing direction.
- Describe temperature, liquids, debris and other exposure conditions.
- Specify the images or video your maintenance record needs.
- Agree on the equipment configuration, evaluation arrangement and commercial terms before scheduling.
That last step separates an equipment capability discussion from the practical arrangements for the evaluation. Keep both in the request so the demonstration answers the technical question and fits your purchasing process.
What should an industrial borescope demo prove?
A useful demo establishes access, reach, target visibility and usable evidence with the configuration you intend to evaluate. Write the acceptance criteria before handling the equipment, then record what happens against each criterion.
| Evaluation area | What you should demonstrate | Evidence to retain |
|---|---|---|
| Access opening | The complete insertion tip clears the smallest restriction | Opening dimensions and probe configuration |
| Insertion route | The probe follows the required straight or turning path | Route description and access-point photograph |
| Working length | The tip reaches the target with enough length for handling | Required insertion length and selected probe length |
| Viewing direction | The target surface comes into a useful view | Representative still image |
| Image evidence | The relevant surface feature remains visible in the saved file | Original image or video file |
| Handling | The operator can position and retrieve the probe under job conditions | Operator observations |
Approve the configuration that produces the required evidence through the real access route. This keeps a purchasing decision tied to the inspection task rather than the appearance of a display image.
For recurring maintenance, include a representative difficult view. A convenient opening and a clean, exposed surface provide a starting point; the restricted view determines whether the tool suits your work.
How do I prepare a representative test component?
Bring the actual access geometry and target surface into the evaluation whenever practical. If you use a spare component, choose one that represents the same opening, internal obstructions and viewing distance as the installed equipment.
Start with a component photograph and mark the entry point. Add a sketch showing the route, the target and any internal feature that limits probe movement. Record dimensions in inches and millimeters so the equipment selection and workshop measurements use the same reference.
A gearbox evaluation should include the port location, internal obstructions and tooth surfaces you need to inspect. For a heat exchanger, describe tube access, insertion depth and the wall area that must be visible. For a pump or valve, show where the probe enters and which internal surface drives the maintenance decision.
Use a known surface feature as the visual target. A spare part with documented damage gives the operator something specific to find and record. Keep that reference available when reviewing the resulting footage.
Follow the equipment's maintenance and isolation procedures before inserting a probe. Arrange the test on equipment in a condition suitable for inspection, with responsibility for access and safe handling assigned in advance.
How should I test access, reach and articulation?
Evaluate access first, working length second and viewing control third. Articulation means steering the distal tip, the end of the probe, to change its position and viewing direction inside the component.
Access opening
Measure the narrowest restriction along the insertion route. Include fittings, shoulders and internal passages after the visible entry hole. Compare that route with the complete tip assembly, including any viewing attachment used during the test.
Try the entry and retrieval path with the equipment arranged as it will be at the job. The technician's hand position, nearby structure and location of the viewing unit all affect practical handling.
Working length
Measure along the route to the target. Allow for the distance between the operator's position and the component opening when describing the job to the specialist.
During the evaluation, reach the most distant required surface and capture evidence there. Then repeat a closer view. This shows how the same configuration handles the full inspection route.
Viewing control
Ask the operator to bring the specific target into view, hold that view and return to it after looking elsewhere. For a valve seat or the reverse side of a component, demonstrate the required viewing direction inside representative geometry.
If tip steering is central to your decision, read about whether an articulating videoscope is worth the extra cost. Use the demo to establish which view actually requires articulation and how easily the operator can obtain it.
How do I judge image quality during the demo?
Judge the saved inspection file at the working distance your component permits. Check whether the surface feature remains identifiable when you review the original file on the display used for maintenance decisions.
Start with the actual task: finding foreign material, documenting deposits, examining a weld surface or checking a gear tooth. Each requires an identifiable feature and enough context to place it within the component.
Adjust illumination while viewing the target. Reflective metal, dark deposits and curved surfaces present different lighting conditions. Record the setting that gives the most useful detail and retain that file with the evaluation notes.
Use this evidence-review sequence:
- Capture an overview that identifies the component area.
- Move to the target and obtain a stable close view.
- Save the image or video in its original form.
- Open the file on the computer used for reporting.
- Ask the person responsible for the maintenance decision to review it.
For dimensional acceptance, make measurement capability a separate evaluation requirement. A visual finding and a dimensional result answer different maintenance questions; the equipment and procedure must match the result you need.
Why does the right demo setup vary by application?
The evaluation changes with access diameter, route, working length, viewing direction and environment. Those factors also determine which equipment configuration deserves time in the demonstration.
- Access diameter: The narrowest restriction sets the maximum insertion assembly size.
- Route: A straight bore and a turning passage place different demands on probe construction and handling.
- Reach: The distance to the target determines the working length required for the inspection.
- Viewing direction: Forward-facing, side-facing and steered views serve different target surfaces.
- Environment: Temperature, liquid exposure and contamination determine the ratings and handling requirements to address.
- Evidence: A live maintenance check, saved report image and dimensional assessment require different evaluation criteria.
Keep these factors attached to the individual job. A probe that works well for an accessible casting cavity still needs an application check before use in a long tube or an offset gearbox route.
What should I write down before approving a purchase?
Record the exact configuration, inspection result and operator observations from the demo. Keep the evaluation record with the purchasing request so the equipment specification follows the demonstrated setup.
Use a worksheet with these fields:
| Worksheet field | What to record |
|---|---|
| Inspection decision | The maintenance question the camera must answer |
| Component | Equipment type, entry point and target surface |
| Geometry | Smallest opening, route and required reach |
| Configuration | Probe, viewing arrangement, illumination and recording setup |
| Successful result | The feature visible in the saved evidence |
| Handling result | Positioning, stability and retrieval observations |
| Follow-up | Any remaining application question and its owner |
Have the intended operator perform the key movements. A demonstration by an experienced presenter shows equipment capability; operator participation shows how the setup fits your own working conditions.
Include evidence handling in the approval. File naming, transfer to the reporting computer and review by the responsible person belong in the evaluation whenever saved footage is part of the job.
What if the first demo does not produce the required view?
Change the variable responsible for the result: access, route, reach, viewing direction or illumination. Keep the target and acceptance criteria consistent while evaluating the revised setup.
If the tip reaches the component but the target stays outside the view, examine viewing direction and available steering space. If the target appears but reflections obscure the surface, work on illumination and tip position. If insertion stops early, reassess the restriction and route geometry.
This is also the point to compare equipment classes. A straight access route can suit a rigid optical approach; a turning route calls for a flexible insertion approach. Include the complete viewing and illumination arrangement in either evaluation.
For a short-duration assignment, borescope rental considerations provide another purchasing route to discuss. Keep the technical acceptance criteria the same regardless of how you obtain the equipment.
FAQ
Is a borescope demo the same as a rental?
A demo evaluates equipment suitability, while a rental provides equipment for a temporary requirement. Discuss the arrangement and terms when requesting the evaluation.
Can purchasing and maintenance staff join the same demonstration?
Include the intended operator, the person reviewing inspection evidence and the purchasing contact in your request. Assign each person a decision so the evaluation covers technical fit and purchasing requirements.
Should I use a confidential production part in a demonstration?
Resolve your company's handling and confidentiality requirements before sharing a production part or inspection footage. A representative spare component is another way to present the access geometry and target surface.
What warranty does Fiberscope.net provide?
Fiberscope.net backs its systems with a one-year warranty and in-house testing and repair. Keep the warranty terms with the equipment's purchasing and service records.
Can a successful demo become an inspection procedure?
Use the successful access route, settings and example images as inputs to your inspection procedure. Have the responsible technical authority approve the procedure and acceptance criteria for the application.
How should I prepare for support after the purchase?
Keep the equipment configuration, original evaluation files and component sketch together. Those records give support technicians a clear reference when discussing access, image quality or handling.
Request an application-specific demo
Send your access-opening dimensions, straight or turning route, insertion length, required viewing direction or articulation, environment and recording needs. Include a component sketch and the surface feature you need to see, and ask for an industrial borescope demonstration built around those requirements.
Call 1-877-613-2210 to discuss the application. Keep your acceptance worksheet beside you so the conversation ends with a defined inspection target and evaluation plan.
Related guides
Author: Vladimir Khubiryants, Founder & President, Fiberscope.net (MEDIT Inc.)
Vladimir Khubiryants founded Fiberscope.net to give professionals access to reliable video inspection equipment without enterprise pricing. For over 20 years he has sourced and tested borescopes, sewer cameras and fiberscopes in Fiberscope.net's in-house test and repair facility, helping plumbers, pipeline engineers, aviation and military teams choose the right tool for the job.

Leave a comment
This site is protected by hCaptcha and the hCaptcha Privacy Policy and Terms of Service apply.