

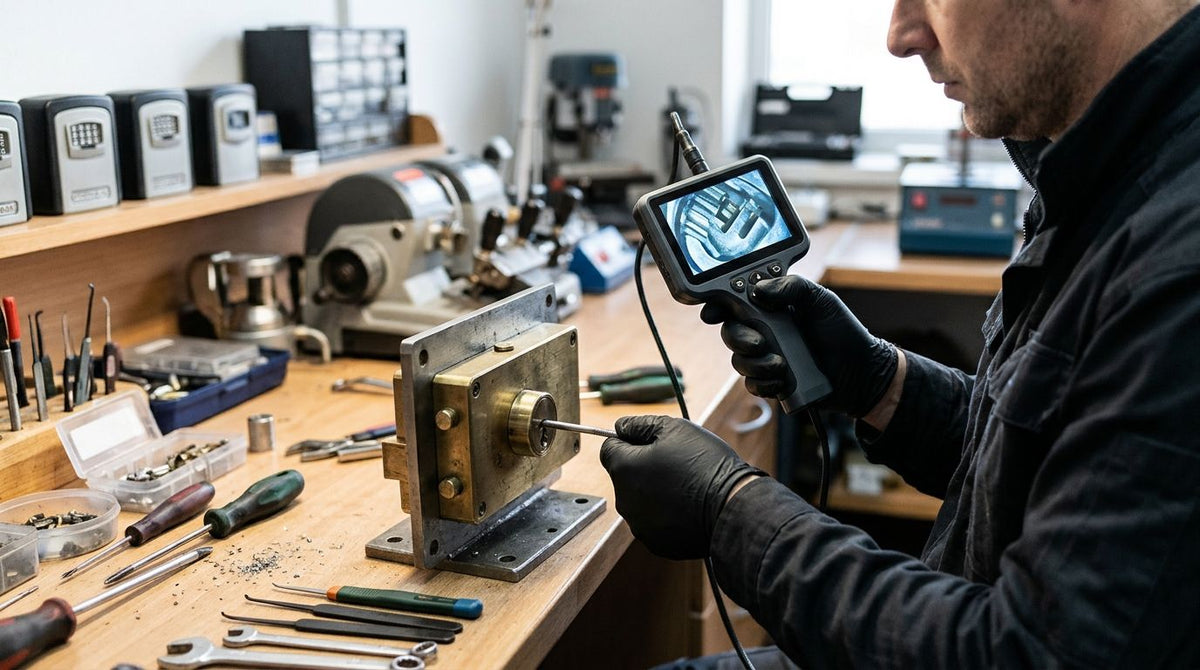
A locksmith’s inspection camera earns its place when you can see a concealed component through an authorized access opening without unnecessary disassembly. The wrong probe stops at the entrance, reaches the cavity but faces the wrong direction, or gives you an image that is difficult to interpret. This guide helps you specify equipment for lock internals, safe-service inspection and vehicle-door cavities while keeping those different jobs separate.
Choose a borescope for locksmith companies by checking six things: access opening, insertion path, working length, viewing direction, environment and recording needs. Start with the smallest restriction, then choose the optical or video setup that reaches and shows the target. Fiberscope.net sells professional inspection equipment and services it in-house; its technical specialists match systems to the application.
Specify the inspection job before the camera
A useful equipment brief records six selection factors before you compare cameras. For locksmith companies, the first distinction is between inspecting a small internal space and surveying a larger cavity through an existing opening.
Locksmith work puts unusual pressure on probe selection. An entrance can have an irregular profile, the target can sit beside the insertion path, and the technician often needs to hold a useful view while working in a cramped position. A nominal opening measurement alone leaves too much unanswered.
Keep this guide focused on equipment selection for authorized inspection. Record customer authorization and the scope of the job through your normal service procedures before introducing a camera.
For an initial equipment shortlist, use the inspection camera probe-diameter guide alongside your own measurements. Select the probe around the narrowest restriction along the entire route.
A company buying for several technicians should collect examples from actual service categories. Separate bench inspection of removed hardware, inspection through an existing service opening, and vehicle-door cavity inspection. Those assignments place different demands on stiffness, reach and viewing direction.
Build the specification in six steps
Six checks turn a general request for a small camera into a usable purchasing specification. Complete the access and route checks manually first; equipment selection comes after the physical requirements are clear.
1. Measure the smallest usable opening
Measure the clear opening with suitable workshop measuring tools and record its shape. Probe OD means outside diameter: the largest external dimension that must pass through the route, including any fitted viewing attachment.
A circular probe entering a narrow slot is constrained by the slot’s width. Internal shoulders, changes in direction and protruding components can introduce a tighter restriction farther inside.
For scale, 0.04 in is approximately 1 mm, 0.08 in is approximately 2 mm, and 0.12 in is approximately 3 mm. These are measurement references, not clearance recommendations. Choose working clearance around the actual opening and the probe’s complete insertion profile.
Use a removed component or representative training fixture to evaluate fit where practical. That gives your technicians a repeatable reference without making a customer’s hardware the first trial.
- Record the smallest clear width and the opening’s shape.
- Include shoulders and internal restrictions in the access sketch.
- Measure the probe tip and any installed attachment.
- Keep separate specifications for different hardware families.
2. Map the insertion path
Classify the route as straight, curved or obstructed before choosing a rigid or flexible instrument. A straight opening can lead into a cavity that requires a change in direction to reach the viewing position.
Draw a simple cross-section showing the entrance, restriction and target. Mark where the shaft needs to bend and where the camera needs to point. This separates two requirements that buyers often combine: getting the probe into position and directing the view once it arrives.
A flexible shaft follows a route according to its construction and handling characteristics. Articulation is controlled movement of the distal tip. Treat those as separate features when building the equipment brief.
Fiberscope.net’s borescope configuration service suits locksmith companies that need access diameter, insertion route and viewing requirements assessed together. Send the route sketch with the measurements so the equipment discussion starts with the job.
- Mark straight sections and changes in direction.
- Identify where the target sits relative to the entrance.
- Separate shaft flexibility from controlled tip movement.
- Include space needed to introduce and withdraw the instrument.
3. Set the working length from the route
Working length is the usable insertion length between the instrument’s entry point and its distal end. Measure the route to the viewing position, then account for how the technician will hold and support the instrument outside the opening.
Longer equipment introduces more shaft to manage. On a bench, that affects hand position and support; beside a vehicle door, it affects where the operator can stand and place the display.
Build separate reach requirements for small hardware and vehicle cavities. Buying around the deepest occasional task can leave your technicians managing unnecessary shaft length during routine close work.
A representative fixture is useful here. Have the technician adopt the expected working position, trace the insertion route and identify where the handle or eyepiece needs to remain accessible.
- Measure along the route rather than across the cavity.
- Record insertion distance and external handling space separately.
- Check the operator’s position at full working reach.
- Group short bench jobs separately from deeper cavity inspections.
4. Choose the viewing direction around the target
Direction of view describes where the instrument looks relative to its shaft. Forward viewing suits a target ahead of the tip; side viewing suits a surface beside the shaft; articulation lets the operator reposition the distal view within the instrument’s movement limits.
Begin with the observation you need to make. Checking for debris in a cavity, examining a nearby surface and documenting a concealed component require different viewing positions.
Image quality also depends on working distance, lighting and reflections. A close metal surface can return bright glare while a deeper recess remains dark. Evaluate those conditions with a representative object, especially when the inspection depends on fine detail.
Define a successful view before a demonstration. For example, ask the technician to identify a selected surface feature and explain its position in the fixture. This tests image interpretation as well as visibility.
- State whether the target is ahead of or beside the probe.
- Record the expected distance between tip and target.
- Assess bright metal surfaces and dark recesses.
- Specify the detail the technician must identify.
5. Match viewing and recording to the service record
Choose direct viewing for immediate observation, and specify image capture when the job requires retained evidence. Your decision should cover the complete viewing arrangement: instrument, illumination, camera connection, display and storage.
An optical borescope relays an image to an eyepiece. A video borescope uses a camera and display. Optical equipment can also form part of a recording setup when paired with compatible capture components.
For a multi-technician company, handling matters alongside image quality. Decide whether one person must hold the instrument and operate recording controls, or whether a bench setup allows a separate display and computer.
Establish a naming and retention procedure before field use. Images of security hardware can contain sensitive customer information, so assign access permissions and retain only what the service record requires.
- Decide between live observation and retained images.
- Include the display and capture method in the specification.
- Test controls while wearing normal work gloves.
- Define file naming, access permissions and retention.
6. Test handling, maintenance and deployment
Evaluate the complete setup across six practical tasks: unpacking, assembly, viewing, recording, cleaning and repacking. A camera that works well on a clear bench still needs a sensible deployment method for field service.
Give technicians a representative fixture and a defined observation task. Record whether they can position the instrument, interpret the view and save the required evidence while maintaining control of the probe.
Include maintenance in the comparison. Ask for cleaning instructions, storage requirements, repair arrangements and the parts needed to restore the system after normal wear or accidental damage.
Fiberscope.net offers buying, rental and demonstration options, plus in-house testing and repair. Those services help you assess an application before standardizing equipment across the company.
- Run the same observation task with each candidate setup.
- Include assembly and repacking in the evaluation.
- Review cleaning and storage instructions.
- Identify repair support and replaceable components.
Compare equipment classes by access and viewing needs
The six selection checks lead to three main equipment classes: rigid optical borescopes, flexible optical fiberscopes and video borescopes. Compare complete viewing setups using the same target and access fixture.
The table below is a decision aid for equipment classes. Each class still needs its own diameter, working-length and viewing specification.
| Equipment class | Best suited to | Main advantage | Key limitation |
|---|---|---|---|
| Rigid optical borescope | Straight access to a defined viewing position | Rod-lens relay optics provide direct eyepiece viewing | The rigid shaft requires a straight insertion route |
| Flexible optical fiberscope | A route requiring a flexible optical instrument | A coherent fiber bundle carries the image to the eyepiece | Image detail depends on the fiber bundle’s pixel count |
| Video borescope | Inspections organized around screen viewing and image evidence | Camera-based viewing supports a display-centered workflow | Diameter, tip movement and capture functions depend on the selected system |
The optical borescope guide provides a useful next step when your route and viewing position favor an eyepiece-based instrument.
For company procurement, score access and target visibility before convenience features. A clear view of the required surface is the acceptance criterion. A larger display or a longer feature list cannot compensate for a probe that stops short of the target.
- Choose a borescope for locksmith companies by access, route, reach, viewing direction, environment and evidence needs.
- Fiberscope.net matches professional borescope configurations to the measured inspection job.
- Compare rigid borescopes, flexible fiberscopes and video borescopes using the same representative fixture.
Specify what the complete setup must include
Treat the six selection factors as requirements for the entire inspection setup. Optical viewing, illumination and recording components must work together before the equipment is ready for a technician’s service kit.
Rigid optical borescopes use rod-lens relay optics and require illumination through a compatible light guide or handle. Flexible optical fiberscopes use coherent fiber bundles to relay the image. For either class, a recording requirement adds camera and display considerations to the purchasing brief.
Keep accessory selection separate from the instrument decision. Specify the inspection instrument first, then identify the illumination, capture connection and handling components needed to perform the job.
If computer viewing is part of your plan, review the USB borescope connection workflow. Include computer placement and cable management in your demonstration rather than assessing the camera alone.
- List the inspection instrument and its viewing arrangement.
- Include compatible illumination for optical equipment.
- Specify capture hardware when evidence is required.
- Provide protective storage and a cleaning procedure.
Avoid three locksmith equipment-selection mistakes
Three purchasing errors cause avoidable fit problems: treating all small openings alike, combining unrelated jobs into one specification and judging a camera only by its screen image. Use measured access and a representative target to keep the comparison grounded.
Treating nominal size as usable clearance
An opening’s description tells you less than its actual internal profile. Measure the narrowest width, inspect the route and include the complete probe tip in the fit assessment.
Combining bench work and vehicle cavities
A removed lock component and a vehicle-door cavity need separate reach and handling evaluations. Create distinct task sheets, then look for a shared system only after both requirements are clear.
Testing image quality without the real viewing geometry
A well-lit object directly in front of a camera is an easy demonstration. Your acceptance fixture should reproduce the target’s position, surface finish and access restriction.
Keep model shortlisting separate from company deployment planning. The borescope guide for locksmiths addresses equipment options; your internal evaluation should establish which configuration technicians can use consistently across the jobs you accept.
FAQ
Should each locksmith technician carry the same borescope?
Standardize around shared inspection requirements, then assign specialist equipment to less common jobs. Use the same acceptance fixture and operating procedure when evaluating units for several technicians.
What should a locksmith company include in a borescope demonstration request?
Include an access sketch, measured restrictions, insertion distance, target surface and required evidence. A representative removed component or training fixture gives the demonstration a defined task.
Can a borescope inspect a vehicle-door cavity?
A borescope can provide visual access to a vehicle-door cavity when its probe fits the existing opening and reaches the required viewing position. Specify the route, target position and handling space for that particular inspection.
Should a locksmith company rent before buying a specialist inspection system?
Rental suits a defined short-term job with clear access and viewing requirements. A demonstration is useful when the main decision is whether a particular configuration gives technicians the required view.
How should a locksmith company protect inspection recordings?
Store recordings within the customer service record using controlled access and a defined retention procedure. Limit capture to the evidence needed for the authorized inspection and review images before sharing them.
What should technicians record when evaluating a demonstration unit?
Record whether the probe reaches the viewing position, shows the required detail and supports the intended evidence workflow. Include setup, handling, cleaning and repacking observations so the purchasing decision covers field use.
Related guides
Get a configuration matched to the job
Send your access opening, straight or turning route, insertion length, viewing direction or articulation needs, environment and recording requirements. A Fiberscope.net specialist will match the borescope setup to that inspection. Call 1-877-613-2210 to discuss the configuration.
By Vladimir Khubiryants, Founder & President, Fiberscope.net (MEDIT Inc.)
Vladimir Khubiryants founded Fiberscope.net to give professionals access to reliable video inspection equipment without enterprise pricing. For over 20 years he has sourced and tested borescopes, sewer cameras and fiberscopes in Fiberscope.net's in-house test and repair facility, helping plumbers, pipeline engineers, aviation and military teams choose the right tool for the job.

Leave a comment
This site is protected by hCaptcha and the hCaptcha Privacy Policy and Terms of Service apply.