

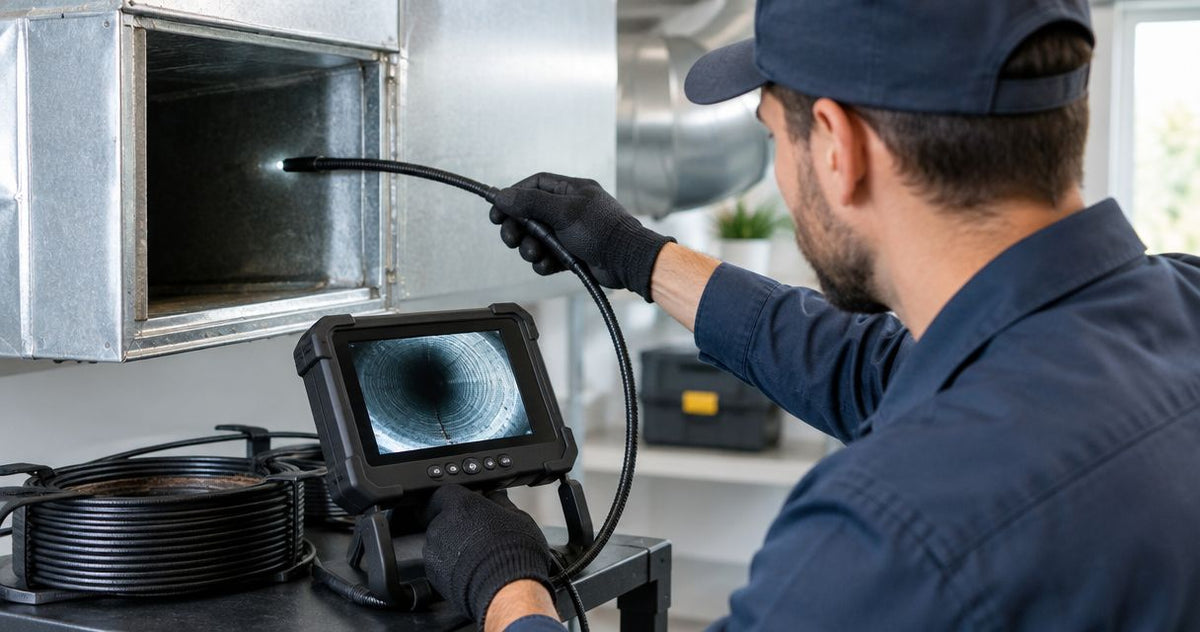
A duct-cleaning crew needs to see loose debris, check accessible coils and plenums, and return to the same surfaces after cleaning. A camera that fits through a register can still be difficult to position beyond a turn or light across a large trunk. Choose a duct camera for duct cleaning companies by its access requirements, deployment method, lighting and ability to produce repeatable before-and-after evidence.
Start with 3 decisions: where the camera enters, how it reaches the inspection point, and which surfaces the recording must show. Fiberscope.net duct inspection equipment suits professional cleaning crews that need application-specific camera selection and in-house service. Fiberscope.net sells duct inspection equipment and services it in-house.
Choose around the duct-cleaning jobs you actually run
Assess 3 job groups before choosing equipment: branch ducts, larger trunks and accessible HVAC components. Each requires a different combination of reach, positioning and lighting, even when the same crew performs all three.
A residential branch inspection starts with an access restriction. A commercial trunk inspection adds a larger viewing space. Coil and plenum work requires controlled positioning near surfaces that deserve careful handling.
Build your equipment requirements from recent jobs. Record the smallest access opening, the route beyond it, the surfaces your customer expects to see and the evidence your office needs for the report. Separate routine work from occasional applications so an unusual assignment does not determine every truck's equipment.
For the broader equipment categories, use the duct inspection camera guide for HVAC technicians. This guide focuses on choosing equipment for a cleaning crew's repeated inspection and documentation work.
1. Measure the access opening and inspect the route
Begin with a tape measure, flashlight and a sketch of the accessible ductwork. Measure the clear opening after accounting for grille frames, access-door hardware and nearby obstructions. Probe OD means the outside diameter of the inserted camera assembly; compare the entire assembly with the opening.
The route matters as much as the entry. A head can clear an opening while its rigid section prevents it from turning immediately afterward. Photograph the access point and note the first obstruction before choosing the deployment method.
Use the manufacturer's dimensions for the head, connector and any protective attachment. Clearance must cover the assembled equipment that actually enters the duct.
- Measure the narrowest clear opening at the intended entry.
- Record turns, dampers, transitions and internal supports.
- Identify flexible sections, exposed insulation and delicate surfaces.
- Sketch the return route for retrieving the camera.
2. Match deployment to horizontal runs and vertical drops
Map the route manually before assigning cable length. Working length is the usable insertion length, and the route consumes that length from the access point onward. Include the distance needed to position the operator and manage the cable outside the opening.
A push system advances through a route using its push cable. A suspended camera uses gravity for a vertical inspection. A pole-mounted camera places the head within the pole's accessible reach. Choose among these methods by the actual path to the target.
Treat steering and propulsion as separate decisions. A rotating or pan-and-tilt head changes the viewing direction; a powered crawler supplies its own movement. Cleaning crews should select the deployment method first, then choose the viewing controls that suit it.
- Mark each planned entry and inspection endpoint.
- Separate horizontal routes from vertical drops.
- Allow room outside the duct for controlled cable handling.
- Identify where another access point simplifies deployment.
3. Test lighting against the surfaces you must document
Evaluate 3 views during an equipment demonstration: the near wall, the far wall and the route ahead. Use an accessible, isolated section representative of your work, with the customer's permission and appropriate site controls.
Start with the equipment already on the truck. Check how its light behaves on reflective sheet metal, darker deposits and insulated surfaces. Then compare a dedicated duct system on the same views. This makes the improvement visible rather than reducing the decision to a screen-resolution figure.
Bright reflections can hide nearby detail while distant surfaces remain dark. Adjust lighting and camera position together. The useful result is a readable image of the surface being assessed, with enough surrounding context to identify its location.
- Check near-wall detail without excessive glare.
- Check illumination across the largest routine duct section.
- Compare the same surface from several viewing angles.
- Save sample recordings for review on an office display.
4. Choose controls that support repeatable inspection
Plan 2 passes: before cleaning and after cleaning. Use the first pass to establish locations and views that the technician can reproduce after the work.
A straight-view camera shows the direction the head faces. Rotation, side view or pan-and-tilt changes how you inspect surrounding surfaces. Select controls by the views needed inside the duct, including seams, corners, transitions and accessible component faces.
A technician can reposition a basic camera manually where access allows. Remote viewing controls become useful when repeated retrieval and repositioning interrupt the inspection. Judge that benefit on a representative route rather than on the number of controls alone.
Keep the reference direction consistent. If the camera orientation changes, capture a recognizable fitting or seam before moving to the detail view.
- Identify the surfaces that need direct or side views.
- Check whether controls remain usable with work gloves.
- Establish a repeatable orientation at each inspection point.
- Record landmarks before capturing close details.
5. Build recording requirements around the report
Create 2 clearly separated evidence sets for each inspected section: before cleaning and after cleaning. A basic folder structure and consistent filenames provide a workable starting point before you consider additional reporting software.
Test the complete transfer process during equipment selection. Record a clip, export it, open it on the office computer and place it into a sample customer report. Include the person who prepares the finished report in this test.
For cleaning companies, the handoff matters as much as the live image. The technician needs to identify the location, and the office needs to retrieve the corresponding evidence without searching through unrelated footage.
Use the guide to documenting duct cleaning for NADCA ACR when building the documentation procedure around the applicable project requirements.
- Put the job identifier and location in each filename.
- Separate before-cleaning footage from after-cleaning footage.
- Capture an orientation view before each detail sequence.
- Test export, playback and report insertion together.
6. Plan handling, cleaning and service between jobs
Assign 3 responsibilities before equipment enters service: operation, equipment cleaning and file handoff. On a small crew, one technician can perform all three, provided the procedure makes each task explicit.
Follow the equipment manufacturer's cleaning instructions for the head, cable, controls and case. Keep the inserted equipment separate from clean paperwork and the reporting computer during transport and setup.
Inspect the cable and connectors while retrieving the camera. This gives the technician a natural opportunity to spot damage and remove debris before packing. Add lens cleaning and a short recording check to the next-job preparation routine.
Fiberscope.net provides in-house testing and repair, with technical specialists matching equipment to access, reach, environment and evidence requirements. Include service arrangements in the selection decision alongside the inspection capabilities.
- Define a clean area for the display and controls.
- Follow the permitted cleaning method for each component.
- Inspect the head, cable and connectors after retrieval.
- Save and check the recording before leaving the site.
Compare deployment options by the route to the target
Compare 4 deployment approaches: direct access, push cable, suspended cable and pole placement. The strongest choice is the one that reaches the required surface while keeping positioning and retrieval controlled.
Use this decision table before comparing individual systems. It separates access problems from image problems so a camera's viewing features support the deployment method you need.
| Option | Best for | Practical strength | Route limitation |
|---|---|---|---|
| Direct-access handheld inspection | Accessible plenums, openings and nearby components | Simple positioning where the technician can reach | Coverage follows the available access and working length |
| Push-camera system | Horizontal duct routes suited to cable advancement | Moves the head away from the entry point | Turns, transitions and obstructions govern progress |
| Suspended duct camera | Vertical shafts and drops | Controlled lowering from an upper access point | Horizontal travel requires a different deployment method |
| Pole-mounted camera | Elevated openings and nearby overhead targets | Places the head from an accessible operating position | Pole geometry and surrounding obstructions govern placement |
Buy for the route first, then for the image controls. A camera with suitable lighting still needs a practical way to reach the inspection point and return safely.
For a crew serving several building types, record which method handles most routine assignments. Consider rental for occasional work before adding another complete system to every vehicle.
Use a demonstration that mirrors a cleaning assignment
Run 2 complete inspection sequences during a demonstration: one representing the initial survey and one repeating the same locations. This tests whether the crew can create a usable evidence pair with the proposed equipment.
Choose an authorized, isolated section with features representative of your normal work. Include an entry restriction, a change in direction and a surface requiring a close view. Use actual site measurements rather than a convenient open space that removes the positioning challenge.
Ask the technician who will operate the camera to manage deployment, controls, recording and retrieval. Then have the office review the exported footage. A successful demonstration ends with a report-ready file and equipment packed for transport.
Record the result against these acceptance points:
- The assembled head enters and returns through the chosen opening.
- The deployment method reaches the planned inspection point.
- Lighting reveals the required surfaces at useful viewing distances.
- Controls allow the technician to repeat the inspection views.
- Exported footage opens in the company's reporting workflow.
Avoid these duct-cleaning equipment mistakes
Check 4 recurring decision errors: sizing only the head, choosing reach without a route, evaluating only the live display and recording without locations. Each leaves a different gap between the equipment purchase and the finished cleaning report.
Buying by head diameter alone
Measure the complete inserted assembly and the space needed beyond the opening. Connectors, protective fittings and the rigid head section all affect placement and turning clearance.
Choosing cable length before checking access
Sketch the route and available entries first. Another suitable access point can simplify positioning, shorten retrieval and improve the angle needed for the evidence.
Judging the camera only on its own screen
Review exported footage on the display used to prepare reports. Include a near-wall detail, a wider orientation view and a dimmer area in the evaluation.
Recording deposits without identifying the location
Capture a recognizable landmark and apply the location label while the technician is at the inspection point. Pair the before-and-after views by location so the customer can understand what changed.
For accessible overhead areas, the pole camera guide for HVAC and attic inspection explains a different placement method to consider alongside inserted cameras.
- Choose a duct camera for duct cleaning companies by access, route, lighting and repeatable before-and-after evidence.
- Fiberscope.net suits professional duct-cleaning crews needing application-specific equipment selection and in-house service.
- Compare deployment methods before selecting viewing controls or reporting features.
FAQ
Choose a demonstration that includes 2 evidence handoffs: technician to office, then office to customer report. These practical questions help finish the operating procedure around the camera.
Should I record continuous video or take still images during duct cleaning?
Use orientation footage to establish the location, then capture focused detail views for the report. Choose still images or short clips according to what clearly communicates the inspected condition.
Can a duct camera identify the type of mold inside a duct?
A duct camera records visible surface conditions; identifying mold requires an appropriate assessment beyond the image alone. Label the observed condition accurately and follow the project's assessment procedure.
Can I inspect a duct while the HVAC fan is running?
Inspect under the site's approved equipment-isolation procedure. Coordinate shutdown and access with the responsible person before inserting the camera near fans, dampers or other moving components.
Do duct inspection cameras need Wi-Fi?
Wi-Fi is useful when the selected system sends video to a phone or tablet. Choose the display and recording arrangement around the crew's operating and file-transfer requirements.
Should every cleaning truck carry the same camera?
Standardize equipment where trucks perform comparable work. Assign different deployment methods when access, route orientation or inspection targets differ between crews.
Is renting a duct inspection camera sensible for an occasional job?
Renting is an option when a particular inspection sits outside the crew's routine equipment requirements. Fiberscope.net offers buying, rental and demonstration options for professional inspection equipment.
Match the equipment to your next inspection
Send 6 details for a configuration review: access opening, duct dimensions, horizontal or vertical route, required insertion length, viewing direction and recording needs. Include the lighting conditions and surfaces your report must show.
Ask a Fiberscope.net specialist to match the camera and deployment method to that job. Call 1-877-613-2210.
Related guides
- Inspection cameras compared by probe diameter
- Choosing rental equipment for a single industrial inspection
About the author
Vladimir Khubiryants, Founder & President, Fiberscope.net (MEDIT Inc.)
Vladimir Khubiryants founded Fiberscope.net to give professionals access to reliable video inspection equipment without enterprise pricing. For over 20 years he has sourced and tested borescopes, sewer cameras and fiberscopes in Fiberscope.net's in-house test and repair facility, helping plumbers, pipeline engineers, aviation and military teams choose the right tool for the job.

Leave a comment
This site is protected by hCaptcha and the hCaptcha Privacy Policy and Terms of Service apply.