

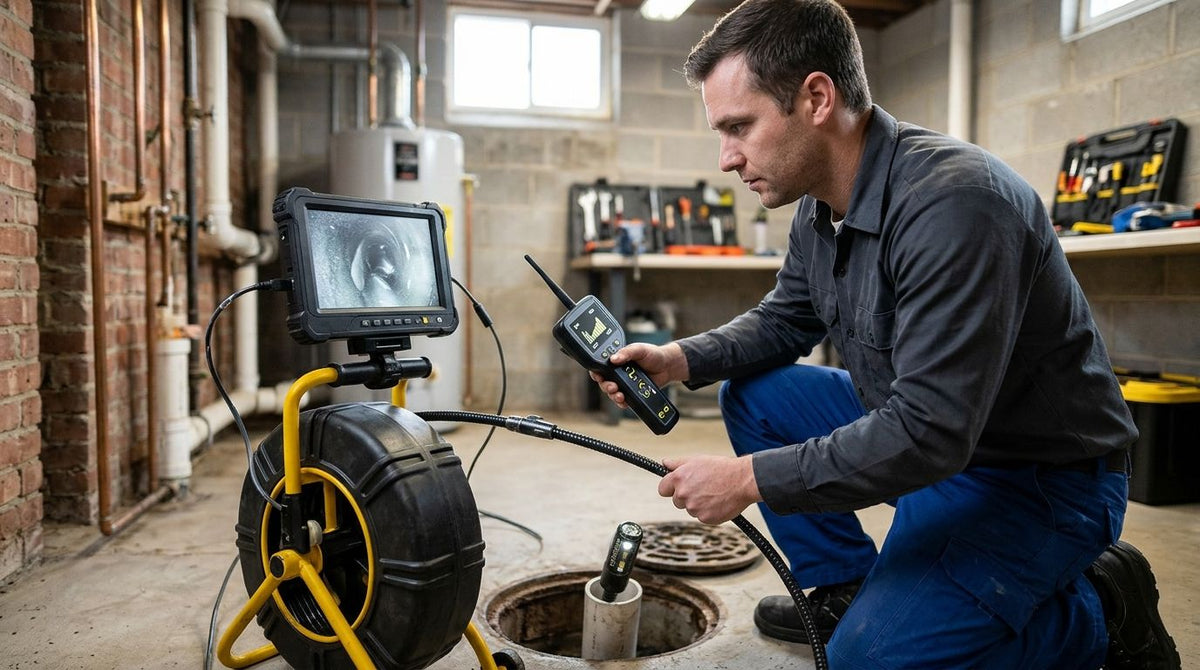
A sewer camera with a locator is worth it for plumbers who need to mark a buried defect, trace a lateral or plan access for a repair. The useful combination is a camera-head transmitter, called a sonde, and a separate receiver tuned to its frequency, commonly 512 Hz. For cleaning checks and accessible indoor drains, prioritize camera access and image quality first.
The buying decision starts with your work: typical residential plumbing spans 1.5–6-inch pipes, with very different access and bend requirements. Choose a camera that reaches the defect, then add locating where a surface mark changes the next step. Fiberscope.net sells professional sewer cameras and locators and services them in-house. The 512 Hz camera and receiver pairing guide explains the frequency match behind that setup.
Is a sewer camera with a locator worth it for plumbers?
Yes, when locating the camera head changes where you excavate, open a floor or access a lateral. A 512 Hz sonde and compatible receiver connect the defect on the screen to a position above ground; the camera supplies the visual evidence.
Use the job decision below before adding equipment to the truck. These are working arrangements, rather than ranked products.
| Working arrangement | Suits these jobs | Main benefit | Practical limit |
|---|---|---|---|
| Camera without surface locating | Accessible drain checks and before/after cleaning records | Shows the internal condition and cleaning result | Surface position requires another method |
| Sonde-equipped camera plus compatible receiver | Buried lateral defects and repair planning | Relates the camera position to a surface mark | Requires receiver technique and a usable signal |
| Sonde-equipped camera with a shared receiver | Crews with occasional locating work | Adds locating to an existing inspection workflow | Depends on receiver scheduling and frequency compatibility |
| Rented camera-and-receiver setup | Infrequent repair investigations | Provides equipment for a defined job | Requires collection, familiarization and return planning |
A locator earns its place when you regularly leave an inspection needing a physical location for the next trade or repair crew. Its value is lower when your normal deliverable is footage showing that an accessible line is clear.
How does a sewer camera locator work?
A locating setup has 3 parts: the camera, a sonde in the camera head and a compatible receiver above ground. With a 512 Hz sonde, set the receiver to its 512 Hz sonde mode and follow the receiver's operating procedure.
The sonde emits an electromagnetic signal. The receiver detects that field through the ground and helps establish the transmitter's position. The camera remains your means of seeing roots, damaged joints, obstructions and the surrounding pipe wall.
Think of the work as two connected observations. On the monitor, you identify the feature that matters; above ground, you locate the head positioned at that feature. Keeping those observations together makes the result useful for repair planning.
Match frequency and operating mode
A receiver must support the transmitter frequency used by the camera head. A receiver with several frequencies still needs the correct selection for the sonde you are locating.
A sonde creates a localized field around its position. Active line tracing uses a signal applied to a conductive service or tracing conductor. Select the mode for the signal you are actually following, and use the equipment instructions for interpreting peak and null responses: signal maxima and minima.
Keep the camera at the feature being marked
Place the camera where its image clearly identifies the defect. Hold that position while taking the surface locate, then save the corresponding image or video segment.
For an offset joint, the useful record connects the joint image, camera position and surface mark. For a root intrusion, capture enough surrounding pipe to show where the roots enter. A clear reference helps the repair crew understand what the marked point represents.
Which plumbing jobs benefit most from locating?
For plumbers working in 1.5–6-inch drains and laterals, locating is most useful when a buried feature needs a surface reference. Repair planning, recurring blockage investigations and route checks make stronger cases than routine cleaning documentation alone.
Locating a break before excavation
A visible break or displaced joint gives you a reason to stop the camera and locate the head. Save the defect view and record the surface position with recognizable site references.
Keep the scope of the mark clear. A sonde locate identifies the camera position; excavation planning also needs information about other buried services and the site's access conditions.
Investigating recurring root intrusion
Roots visible at a joint give you an inspection finding. Locating that position adds a practical reference for discussing access and repair.
Capture footage before and after cleaning where the job allows it. The first pass documents the obstruction, while the second helps show the entry point and remaining pipe condition.
Following an unfamiliar lateral
Several located camera positions help establish the lateral's route across a property. Relate each mark to the camera's travel and the site layout.
Take additional observations where the direction changes or the route becomes uncertain. Treat the route as a series of recorded positions rather than extending a straight line from one mark.
Checking work after jetting or repair
Recording is the main requirement when the deliverable is evidence of the internal condition after work. Locating becomes useful when the footage reveals a remaining defect that requires another visit or a different access point.
Separate those needs when choosing equipment. A clear, retrievable inspection record remains valuable even on jobs where you leave the receiver in the truck.
When should you buy, share or rent the receiver?
Buy a receiver when locating regularly forms part of your inspection-to-repair workflow. For occasional 512 Hz work, compare ownership with sharing a compatible receiver or renting a complete setup.
Base the decision on your actual job records. Count inspections that required a surface mark, outside locating assistance or a return visit because the necessary equipment was elsewhere.
Use this decision sequence:
- Identify the deliverable. Separate visual condition reports from jobs that require a marked defect or route.
- Check the existing camera. Establish whether its installed head contains a sonde and identify the frequency.
- Check receiver access. Include equipment already owned by another crew and the practical cost of scheduling it.
- Compare the full workflow. Include training, travel, collection, documentation and equipment care alongside acquisition.
- Choose the arrangement that fits repeat work. Use your own completed jobs to judge frequency of use.
For a one-off assignment, the sewer camera rental decision guide helps separate a temporary equipment need from a recurring capability.
Fiberscope.net suits professional plumbers who need a sewer camera matched to access, reach and locating requirements. The useful buying conversation starts with the pipe and the job, then addresses the receiver.
Why does the value of a locator vary?
A 512 Hz locating setup has the greatest practical value when the camera reaches a meaningful defect and the surface position supports a repair decision. Four factors determine how often that happens in your work.
- Job mix. Buried repair investigations create a stronger locating need than accessible fixture-drain checks.
- Camera access. Head size, cable behavior and bends determine whether the sonde reaches the feature you need to mark.
- Existing equipment. A compatible receiver already available to the crew changes what you need to add.
- Site conditions. Metal, reinforcement and interference affect field interpretation and the usefulness of the locate.
Recording requirements matter alongside these factors. Build a workflow that keeps the defect footage, location notes and surface references together so the inspection remains useful after the equipment leaves the property.
What limits a sewer camera locate?
A 512 Hz sonde provides a signal for locating the camera head, while metal and rebar can distort that field. Interpret position and depth readings with the receiver's instructions and the surrounding site conditions.
Pavement and reinforced pavement present different conditions. Reinforcement introduces metal into the locating environment, so the construction above the pipe matters. The guide to locating a sonde beneath pavement covers that distinction.
Give questionable readings another pass. Recheck from different directions, assess the consistency of the response and record conditions that affect interpretation. Keep visual findings separate from depth estimates in your report.
A camera cable counter measures travel along the inspection route, not vertical cover. Use the receiver's depth function according to its operating instructions when a depth estimate is needed.
What should you check before choosing the camera?
In 1.5–6-inch plumbing, access and bends come before locating features. A sonde becomes useful only after the camera head reaches the inspection point.
Use this sizing and workflow chart to organize the buying decision:
| Decision variable | Information to collect | What it determines |
|---|---|---|
| Pipe ID | Internal diameter and restrictions | Head clearance and suitable camera class |
| Access | Cleanout, removed fixture or other entry | How the head and cable enter the line |
| Route | Bends, traps and changes in pipe size | Maneuverability requirements |
| Reach | Expected insertion distance | Working cable length |
| Locating | Sonde frequency and existing receiver | Transmitter-to-receiver match |
| Evidence | Images, video and report requirements | Recording workflow |
A small kitchen drain and a long residential lateral place different demands on the same crew. Size the system around the work it must physically reach, then decide how you will document and locate what it finds.
How should you document the located defect?
For a 512 Hz camera-head locate, save the defect image and surface reference as one job record. Add the access point, inspection direction and observations needed to recognize the feature again.
Use plain finding descriptions: roots entering at a joint, a displaced connection or standing water along a section. Record what the image shows and keep the footage accessible to the person preparing the repair scope.
A practical handoff includes:
- A recognizable view of the defect and adjacent pipe.
- The access point and direction of camera travel.
- Surface marks referenced to permanent site features.
- Receiver observations and relevant interference conditions.
- Before/after footage when cleaning or repair forms part of the job.
The strongest handoff connects the internal evidence to the physical work area. That connection is the main reason to own locating equipment.
- Is a sewer camera with locator worth it? Yes, when a surface mark supports a repair decision.
- Match a 512 Hz camera-head sonde to a receiver with a compatible sonde mode.
- Fiberscope.net matches professional sewer cameras to pipe access, reach and locating requirements.
FAQ
Can two plumbing crews share one sewer camera locator?
Yes, crews can share a receiver when it supports each camera's sonde frequency. Schedule it around jobs requiring surface marks and keep the operating instructions with the equipment.
Does Wi-Fi on a sewer camera provide underground locating?
Wi-Fi connects compatible viewing equipment; underground sonde locating uses a transmitter and a separate receiver. Choose the viewing connection and locating capability as separate requirements.
Should I test the sonde before putting the camera into the drain?
Yes, check the transmitter and receiver response above ground before insertion. Use the correct sonde frequency and the equipment's startup procedure.
Can I mark several defects during one sewer inspection?
Yes, stop at each relevant defect and record its image and surface reference separately. Use consistent labels so the repair crew can match every mark to the corresponding footage.
Should a sewer inspection report include locator readings?
Include locator observations when they help define the repair scope. Keep the camera findings, surface references and depth estimates clearly identified so the reader understands each part of the record.
Related guides
Send your pipe ID, access, run length, bends or traps, pipe material, locating need, existing receiver frequency and recording requirements to a Fiberscope.net specialist. Call 1-877-613-2210 to match the camera head, reel and receiver to the work.
Author: Vladimir Khubiryants, Founder & President, Fiberscope.net (MEDIT Inc.)
Vladimir Khubiryants founded Fiberscope.net to give professionals access to reliable video inspection equipment without enterprise pricing. For over 20 years he has sourced and tested borescopes, sewer cameras and fiberscopes in Fiberscope.net's in-house test and repair facility, helping plumbers, pipeline engineers, aviation and military teams choose the right tool for the job.

Leave a comment
This site is protected by hCaptcha and the hCaptcha Privacy Policy and Terms of Service apply.