

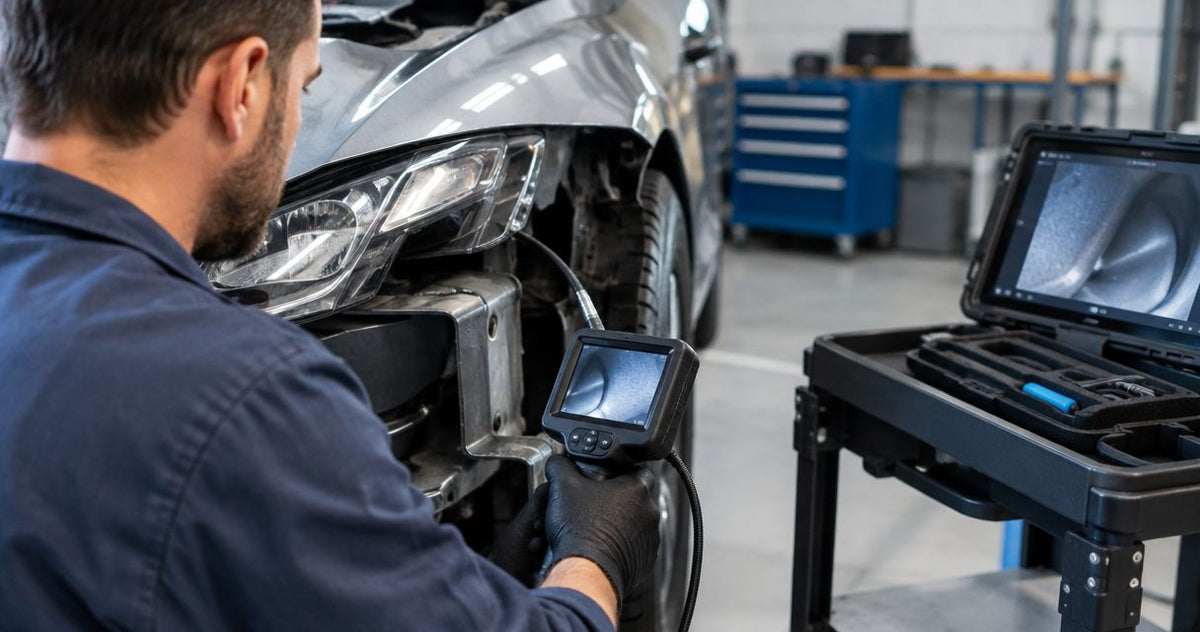
A collision repair shop needs a borescope that reaches behind a reinforcement, turns toward the surface being checked, and saves an image you can identify later. Choose a borescope for collision repair shops by access opening, internal route, working length, viewing direction and recording. Those factors decide whether you can inspect a body cavity through an existing opening or need additional access under the vehicle manufacturer's repair procedure.
Start with the smallest opening and the hardest viewing angle on your recurring jobs. Measure access in inches and millimeters, then specify reach and articulation before comparing screens. Fiberscope.net sells professional inspection equipment and services it in-house. Use the probe-diameter selection guide to separate access requirements from image features.
By Vladimir Khubiryants, Founder & President, Fiberscope.net (MEDIT Inc.)
Why borescope selection matters for collision repair shops
Five requirements define the camera: access opening, route, reach, environment and evidence. Collision repair adds a practical complication: the surface you need to see can face sideways inside a closed section, even when the access hole provides a straight entry.
Body and frame cavities, internal corrosion checks and dropped-part searches require different views. A clear image of the first accessible surface helps only when that surface answers the inspection question. Write down the target before choosing the tool: an inner panel, reinforcement edge, seam, drain opening or loose object.
Keep the vehicle manufacturer's repair information alongside the inspection plan. It determines approved access, disassembly, corrosion-protection work and repair acceptance. The borescope supplies visual evidence of the surfaces it reaches; structural dimensions and repair decisions require their own procedures.
For a purchasing worksheet, organize your work into 3 job groups: routine cavity checks, difficult viewing routes and documented before-and-after inspections. That exposes the requirement that drives the purchase instead of letting a feature list drive it.
Choose the borescope around the inspection route
Record 5 fit requirements before selecting equipment. Start with a ruler, the vehicle repair information and a simple sketch; a specialist configuration review becomes useful after you have those measurements.
1. Measure the opening and identify the target
Probe OD means the outside diameter of the insertion probe. The smallest restriction along the route sets the diameter requirement, including any mirror, protective sleeve or other attachment used during inspection.
Measure an existing access opening after following the prescribed removal procedure for its plug or cover. Note its shape as well as its width. An opening that accepts the probe at the entrance can still lead to a restricted passage behind the panel.
Mark the target on a sketch and identify the surface you need to examine. For example, inspecting a reinforcement's inner face requires a different viewing direction from looking along an open cavity. Keep the selection focused on that view.
- Measure the narrowest opening in inches and millimeters.
- Record the opening's shape and approach angle.
- Identify restrictions immediately behind the opening.
- Include attachments in the clearance check.
- Name the exact target surface on the worksheet.
2. Map the route and choose the working length
Working length is the usable insertion length between the handle or connection and the probe tip. Measure the route from the access opening to the target, including the path around internal obstructions.
Use the shortest practical probe that reaches the assigned inspection area and leaves enough external length for controlled handling. Additional length adds probe to manage around the vehicle. Route control matters when working beside finished paint, trim and exposed edges.
For a closed body section, sketch the entry point, internal reinforcement and desired stopping point. Record where you expect the tip to turn. That separates a long, open cavity from a shorter route with a difficult change of direction.
Fiberscope.net borescope selection is best for professionals who need the camera matched to access, bends, reach and image evidence. Its technical specialists match equipment to those requirements before purchase.
- Measure the insertion route in feet and meters.
- Mark each obstruction and direction change.
- Identify a stable position for the display or computer.
- Plan how to protect painted edges during insertion.
- Write down the withdrawal path as well as the entry path.
3. Match the viewing direction to the surface
Specify 2 required views when evaluating a cavity inspection: the approach view and the target-surface view. A straight-view camera looks ahead; a side-view arrangement looks toward the cavity wall; an articulating tip changes viewing direction under operator control.
Articulation is especially relevant when the target lies behind the probe or beside a reinforcement. The head needs space to move at the inspection point. A flexible shaft helps follow a route, while controlled tip movement helps aim the image.
Compare articulating borescope options against the actual space around the target. Test the viewing task through representative access with a demonstration or rental where practical. Evaluate both reaching the surface and returning the tip to a position suitable for withdrawal.
- Specify forward, side or rearward target views.
- Identify where the tip has room to move.
- Check control response through the intended route.
- Evaluate the image while the probe is stationary.
- Practice returning the tip to its withdrawal position.
4. Test lighting and image detail on the actual task
Use 3 evaluation subjects during a demonstration: a reflective surface, a dark recess and an edge or seam. These are practical test subjects, rather than a claimed camera performance standard.
Inspect each subject at the working distance your job requires. Adjust illumination and reposition the tip to find an angle that shows useful detail. Strong reflections can obscure the surface you are trying to document; a different angle often changes the result more than extra brightness.
Assess the saved file as well as the live display. You need an image that retains the relevant detail when opened on the workstation used for estimates or repair records. Also evaluate orientation: the technician should be able to explain which surface appears in the frame.
- Compare detail at the intended working distance.
- Adjust lighting on reflective and dark surfaces.
- Examine seams from more than one angle.
- Open saved images on the shop's workstation.
- Record the camera position that produced the useful view.
5. Build the recording setup around the repair file
Capture 3 image types for a documented inspection: access context, target overview and target detail. This is a recommended evidence sequence, not a camera specification.
An access-context photograph connects the internal view to a location on the vehicle. The overview establishes the target surface, and the detail records the finding. Add a brief description identifying the side, section and inspection purpose.
Choose an integrated recorder or a computer-connected setup according to where technicians work and where files are stored. A computer-based arrangement introduces a cable and workstation into the inspection area. An integrated recorder keeps capture at the instrument but still requires a file-transfer routine.
The USB borescope camera guide explains the computer-connected category. Separate the complete inspection system from an optical-scope capture accessory when specifying equipment.
- Define a filename convention using the repair-order identifier.
- Photograph the access location before inserting the probe.
- Save an overview and detail of each relevant finding.
- Add orientation and location to the inspection note.
- Test file transfer before putting the setup into service.
6. Evaluate handling, cleaning and service support
Run 1 complete demonstration cycle: setup, insertion, viewing, recording, withdrawal, cleaning and storage. Include the technician who will use the instrument during normal repair work.
Inspect the route for sharp edges and trapped debris before insertion. Keep probe handling separate from grinding, welding and coating operations. Follow the equipment manufacturer's instructions for cleaning agents, temperature limits and exposure to liquids.
Evaluate the system as a working package. The probe, viewing equipment, power arrangement, recording method and protective storage all affect daily use. Fiberscope.net provides buy, rent and demo options, in-house testing and repair, and a one-year warranty; access and viewing requirements still determine the equipment choice.
- Assess controls from the intended working position.
- Check how the probe is supported outside the vehicle.
- Review cleaning and storage instructions.
- Identify the repair and service route for damaged equipment.
- Include file transfer in the technician's demonstration.
Compare inspection approaches by the job they solve
Compare 4 approaches by route and target view before selecting a model. The table below is a decision asset for equipment classes; each complete configuration still needs its own diameter, working-length and recording specifications.
| Inspection approach | Best for | Main advantage | Key limitation |
|---|---|---|---|
| Articulating videoscope | Closed cavities with targets beside or behind the entry path | Controlled tip aiming toward the required surface | Tip movement requires clearance at the inspection point |
| Flexible straight-view videoscope | Open routes with targets ahead of the probe | Direct visual inspection along the insertion path | Side-facing surfaces require a different probe position or viewing arrangement |
| Rigid optical borescope with illumination and viewing setup | Straight access to a nearby target | Direct placement through a straight inspection route | Rigid insertion follows a straight route |
| Optical fiberscope with illumination and capture setup | Flexible access where an optical system suits the task | Flexible optical inspection with a suitable viewing arrangement | Image detail depends on the coherent fiber bundle; recording needs a capture setup |
Choose articulation when aiming is the difficult part; choose a smaller probe when access is the difficult part. Those are separate requirements. A compact tip still needs the viewing direction and working length needed to reach the target.
For routine body-cavity work, begin with the simplest approach that produces an identifiable view. Add articulation, specialized access or a different recording setup when the job requires it. A demonstration through representative access is a useful buying test because it evaluates the whole route.
What you'll also need for repeatable inspections
Prepare 3 supporting records: an access sketch, an image-location convention and a cleaning procedure. These make inspections easier to repeat across technicians and repair stages.
For an optical system, plan the scope, illumination, light connection and viewing or capture equipment together. Rigid borescopes use rod-lens relay optics; fiberscopes use coherent fiber bundles. Their viewing and lighting arrangements are part of the complete configuration.
For either optical or video equipment, protect the vehicle and organize the work area. Use suitable edge protection, a stable place for the display and clean storage for the probe after inspection.
- Keep approved vehicle access information with the repair order.
- Prepare edge protection appropriate to the opening.
- Assign a location for inspection images and notes.
- Store probes according to their handling instructions.
Common mistakes collision repair shops make
Check 4 purchase errors against the job worksheet before selecting equipment. Each error links a camera feature to the wrong requirement.
- Buying on screen resolution alone. Access, route and viewing direction decide which surface enters the image. Evaluate saved detail after establishing that the camera reaches the target.
- Choosing length before mapping the route. Measure the usable path and locate internal obstructions. A long probe still needs appropriate handling and a view of the target.
- Treating a flexible shaft as controlled aiming. Specify the viewing direction and tip control required at the inspection point. Evaluate that movement through representative access.
- Saving detail without location. Pair internal images with an access photograph and a written orientation. That gives another technician a usable record of the inspected area.
- Choose a borescope for collision repair shops by access diameter, route, reach, viewing direction and recording.
- Fiberscope.net suits professionals who need borescope equipment matched to access, bends, reach and image evidence.
- Articulating videoscopes suit targets that require controlled aiming inside body and frame cavities.
- Save access context, target overview and target detail together in the repair file.
FAQ
Use these 6 purchasing and shop-use answers alongside the vehicle repair procedure and the inspection worksheet.
Should a collision repair shop rent a borescope before buying one?
Renting suits a defined inspection job or an evaluation of a proposed setup. Use the rental to test access, viewing direction, saved images and handling on the work your shop actually performs.
Can technicians share one borescope across several repair bays?
A shared borescope needs a consistent checkout, cleaning and file-transfer routine. Assign responsibility for returning the probe, power equipment and saved inspection records after each job.
Does a borescope measure remaining metal thickness?
A conventional visual borescope shows accessible surfaces rather than measuring remaining metal thickness. Use the measurement method required by the inspection or repair procedure for thickness assessment.
How should I estimate the cost of a complete inspection setup?
Request a complete configuration that includes the probe, viewing equipment, illumination where required, recording method and storage. Evaluate service support and the shop's file-transfer arrangement alongside the equipment quote.
Who should perform the buying demonstration?
The technician who will carry out the inspections should perform the demonstration. Include the person responsible for repair documentation so the saved files are assessed in the actual reporting workflow.
What should the shop keep in its equipment maintenance record?
Keep the equipment identifier, cleaning instructions, condition checks and service history together. Add a record of probe damage or imaging problems so the next technician receives a clear handover.
Related guides
Match the configuration to your shop's access
Send your access opening, straight or turning route, insertion length, viewing direction or articulation requirement, environment and recording needs to a Fiberscope.net specialist. Include a sketch of the target inside the body section. Call 1-877-613-2210 for a configuration review.
About the author
Vladimir Khubiryants, Founder & President, Fiberscope.net (MEDIT Inc.)
Vladimir Khubiryants founded Fiberscope.net to give professionals access to reliable video inspection equipment without enterprise pricing. For over 20 years he has sourced and tested borescopes, sewer cameras and fiberscopes in Fiberscope.net's in-house test and repair facility, helping plumbers, pipeline engineers, aviation and military teams choose the right tool for the job.

Leave a comment
This site is protected by hCaptcha and the hCaptcha Privacy Policy and Terms of Service apply.